Difference between revisions of "DVD format conversion"
m |
m (Rip a DVD moved to DVD format conversion) |
(No difference)
| |
Revision as of 23:57, 29 September 2008
| DVD format conversion Organic Design procedure |
It's important to make backup copy's of DVD's you've purchased so that you're not at risk from the original being damaged and becoming unreadable. We use the DVD::Rip application, which after installed can be found in Applications/Sound & Video.
First time setup
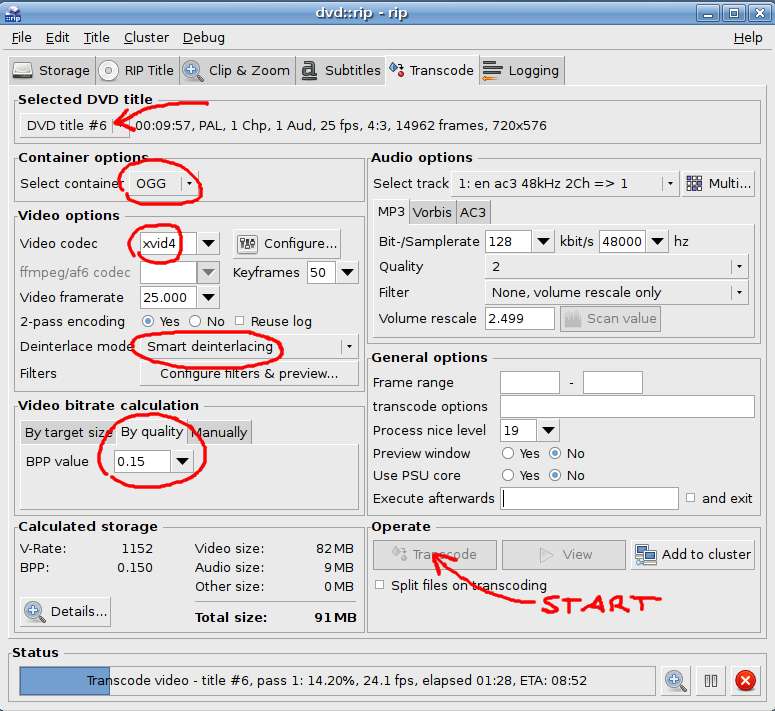
You'll need to specify a location for the data used by the ripping operation and where the final ripped results will be stored. I use ~/Videos/rip for my data. next I like to create a default project called rip which has all the correct transcode settings already in place. We use the OGG format and the xvid4 codec. You should also select smart deinterlacing. When you're first setting up, you don't need to select a track or start the transcoding process, instead just save the project from the file menu.
Ripping a DVD track
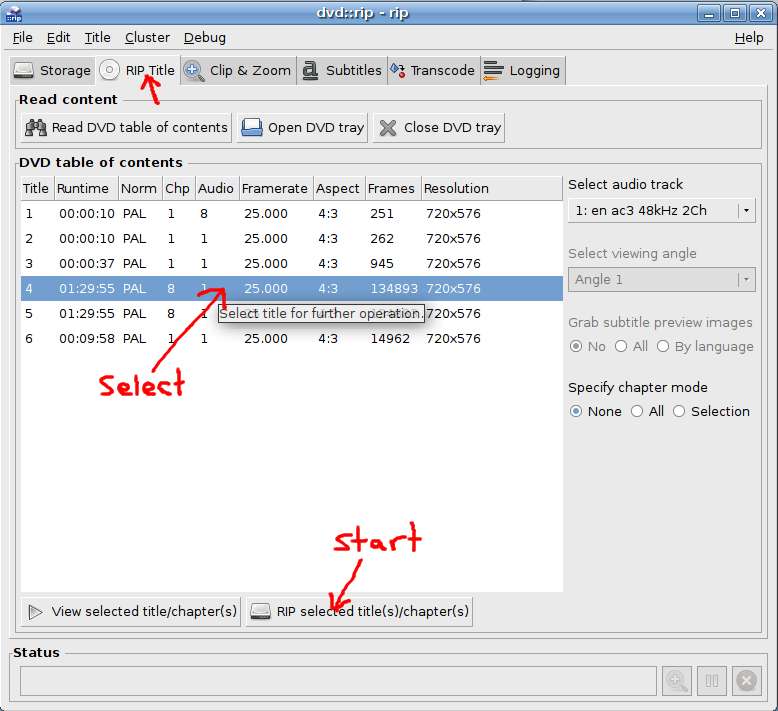
Run DVD::Rip from Applications/Sound & Video, then go into File/Open Project and select your default project that you created in the first time setup above. Next select and rip the tracks you want as shown below.
Then go to the Transcode tab and ensure that all the settings are correct, select the track you want to rip and click the Transcode button to begin the main ripping process. This should take around an hour for a normal length movie. After it's finished you can find the final result in your home folder in Video/rip/rip/avi. You should check that it looks fine, then rename it to a better name and move it to your proper media location. Delete any other files out of the avi folder so they don't become confusing when you rip other things later.


