Fixing my laptop microphone
Last year I got a Purism Librem 13 laptop which is made for Linux and is very privacy focused hardware. But about a month after I got it, the microphone stopped working. It wasn't a problem with the built in kill switch that allows you to completely disable the camera and microphone at hardware level, because it still activated and deactivated the camera properly. I took it in to some laptop specialists we know in Caxias who are very reliable, and they said that the problem was most likely that the wire had come off the microphone since all the connections on the main board were fine. This is a big problem because, the microphone is next to the camera above the screen and is very inaccessible, so I left it because I didn't want to send it all the way back to the US which would take months and probably also involve a huge tax when it returned into Brazil!
But then we got another Purism for Beth, and after about a month of use exactly the same thing happened!!! We asked the Purism engineers if they could explain better how to access the microphone so that maybe our laptop guys could have a go at fixing them. But then later an idea occurred to me - why not just replace the microphone with another one that's in a much more convenient location?
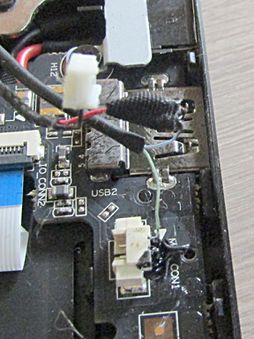
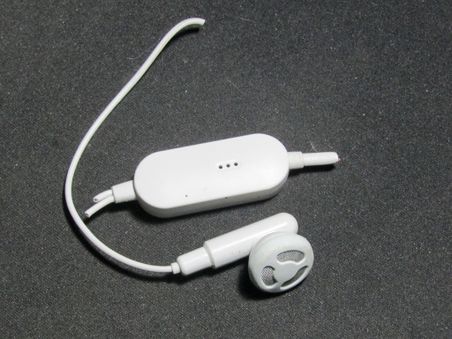
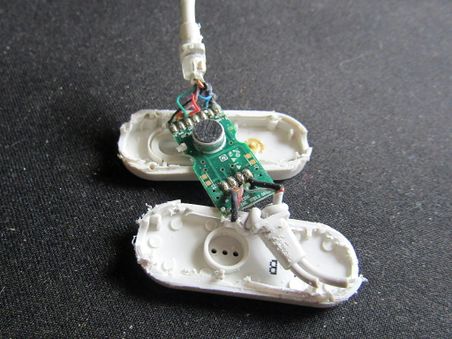
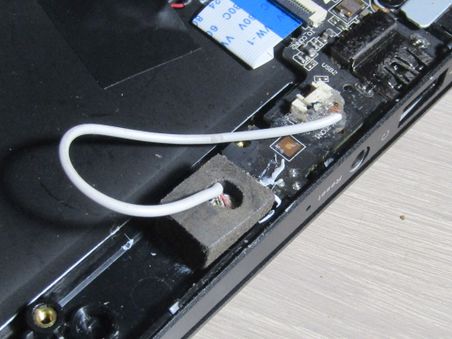
So first I located the connectors which Purism show clearly on their site here. It looked a little different on my model as can be seen in the first photo below, but it seemed like it would be doable as there was a convenient space right next to the connector where I could fit a new microphone that would be to the left of the keyboard which would do just fine. Next I pulled apart some old unused earphones that had a microphone on them, and removed the microphone and some of the wire.
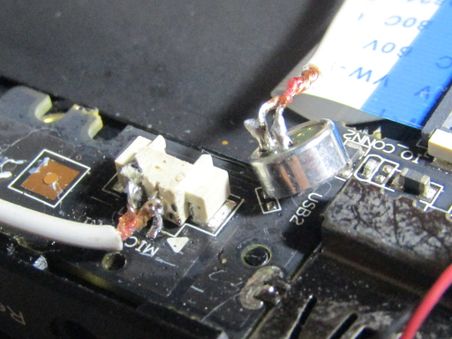
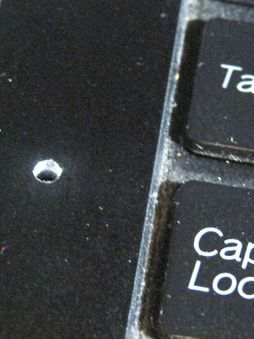
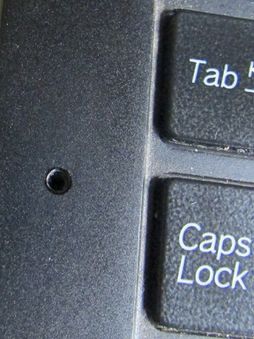
Then I removed the current microphone and kill switch from the connector and soldered on my replacement microphone via a short piece of the earphone wire, and then tested that it worked. It did work! So the next step was to make it into a permanent feature of the laptop! To do this I drilled a small hole in my chosen location to the left of the keyboard, and then I made a small housing for the new microphone out of a rubber grommet from a roofing nail. I then superfixed the housing to the inside of the case so that the microphone would be positioned right over the hole when inserted into the housing.
And that's all there was to it, it works really well!
I should really have connected the kill switch up to the new microphone, but I decided to quit while I was ahead because my eye sight's too bad and my soldering iron's too big! Later I'll take both our laptops in to our guys in Caxias to fix Beth's and get both kill switches working. As a final finishing touch I countersunk the hole a little and dabbed a black permanent marker on it to make it a bit more subtle :-)
