Create a LiveCD
| Create a LiveCD Organic Design procedure |
Purpose
The organicdesign-workstation package (and currently also the Ubuntu Post Install) are used to quickly set up a workstation in our network in a standard configuration. Later this will include local content for setting up a customised wiki organisation including all the training material and procedures.
Having the workstation package available as a live CD is even more convenient and re-usable still, but is also a bit more difficult because it's really about maintaining an Organic Design distro.
If we could also make the media usable from within an existing operating system rather than only working in a bootable way, then it would replace the current implementation of Training on a stick. It shouldn't be too difficult to make a single executable binary for each OS which results in a running instance of a wiki organisation.
Method
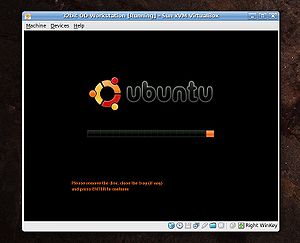
There are two open source tools used in the procedure; The first is RemasterSys which is used to build a bootable ISO image of the current system to make a replica of it easily installable by others. The second is Sun's VirtualBox which is a very robust and simple application for running virtual x86 machines. Using these we can have two virtual machines running, a 32bit and a 64bit both installed with Ubuntu and all the necessary Organic Design packages and configurations. Both are installed with RemasterSys so that each month we can run each virtual machine, bring it up to date and build its ISO.
You can gain access to detailed configuration of each machine by selecting it from the list and clicking the "settings" button (the machine must be in "Powered Off" state for the settings button to be enabled). One useful non-default setting is to attach the network to the host interface instead to the NAT.
Setting up a virtual machine
VirtualBox is extremely easy to set up and configure. I was able to set up two virtual Ubuntu boxes in about half an hour, one 32bit and one 64bit. To install an OS on the newly created machine, simply select Linux and Ubuntu from the drop-down lists and supply an appropriate Ubuntu installation ISO file for your machines CD/DVD device and then start it, easy as that!
Building an ISO
Once the machine is installed, configured and updated an ISO can be built to be uploaded to the site and written to DVD's for distribution. The ISO image which can be written to a DVD or memory stick. RemsterSys removes the home directories and boots into the desktop as a live session user with all the Ubuntu defaults, so the default installed applications and theme may need to be replaced to customise our distribution the way we want it.
First ensure that RemasterSys is installed on the virtual machine by adding their repository to /etc/apt/sources.list then updating and installing as follows.
Simply run the following command to create the ISO image. You may also wish to set some configuration options in /etc/remastersys.conf first, such as the title of the disc or ISO file and the name of the live session user. It's a good idea to set the boot-loader to "GRUB" so it's the same as the official Ubuntu LiveCD booting process.
The generated ISO
Using the current process, the resulting OS installed from the generated ISO leads to the normal Ubuntu default menus, quickbars and program customisations, so we need to find where all those are stored.
All the installed applications, databases and daemons in the source installation will be preserved and will be available to the live session user. But some configuration such as /etc/hosts will be returned to the defaults. The apt sources and crontab are both preserved.
Sharing files with a virtual machine
The way I'd prefer is by tying the network adapter to the host adapter but I haven't been able to get that to work. The alternative is to enable shared files, but this requires the guest additions to be installed into the virtual machine's kernel and I don't know what effect this has on a real machine installed with an ISO that has these additions in it.
To enable the shared files, first map the machines CD drive to the GuestAdditions ISO which is in the menu by default. Then open a root prompt in the virtual machine and run the appropriate script with only shared folder support, for example:
You can then add a new shared folder from the device menu, and then mount it as in the following example:


