Banana Pi
Banana Pi is an open source hardware project lead by GuangDong BiPai technology co., LTD. It focuses on the open source hardware development board of ARM and MCU series, provides open software and hardware platform, and creates the basic technology development platform. Full series open source hardware products, complete integration of voice, data, video system platform. Developers can flexibly build various application platforms on the open source hardware foundation platform. It can be applied in the Internet of things, AI artificial intelligence, industrial Internet control, STEAM education and other aspects.
The Banana Pi boards are inspired by the Raspberry Pi project, and some of the models have an equivalent Raspberry version which is hardware compatible and exactly the same size so that they can work as drop-in replacements for projects that are designed around Raspberry Pi boards. The Banana Pi boards are more powerful than the Raspberry boards, and have more features, for example many Banana Pis such as the Banana Pi M1+ come with a SATA port, an on-board microphone and an IR receiver. Having a SATA port means it's easy to run the system off a proper hard drive rather than an SD card which makes the board into a far more reliable system suitable for long-running busy server solutions.
Note that the concept of a "drop-in" replacement only goes so far in the world of single-board computers, because OS images need to be built specifically for each board. The Debian-based Armbian project is very good for this because it's been designed to be able to quickly support new boards and OS releases as they come out, and it has a great tool for post-installation setup called the Armbian config utility. They currently support over 300 different boards including the whole Banana Pi series!
Contents
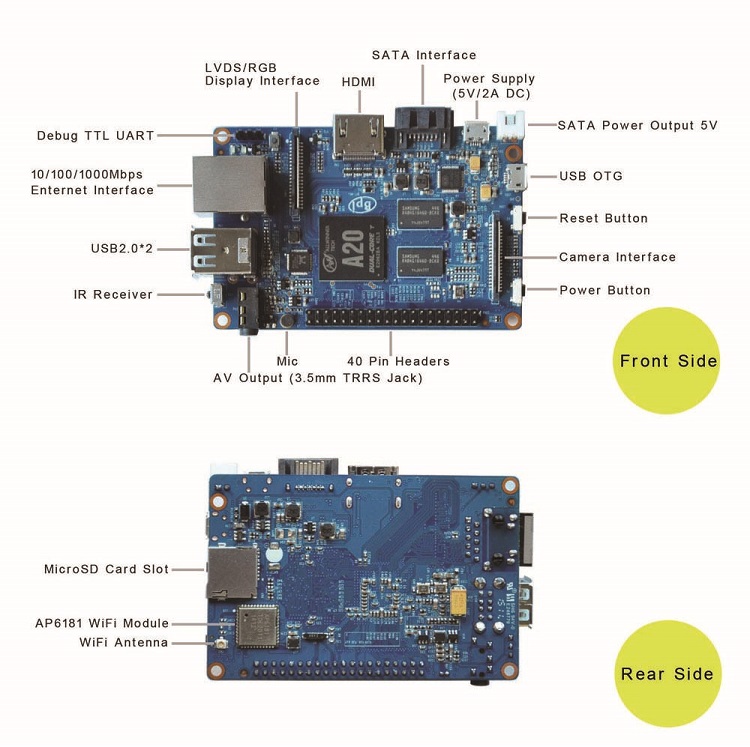
Banana Pi M1+ board layout
External wifi antenna
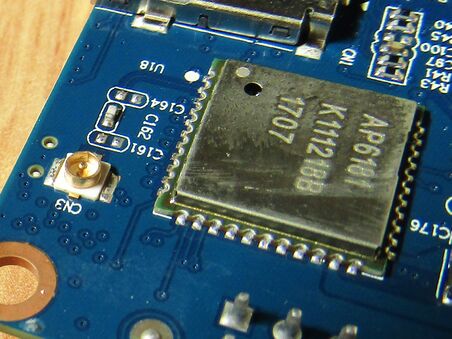
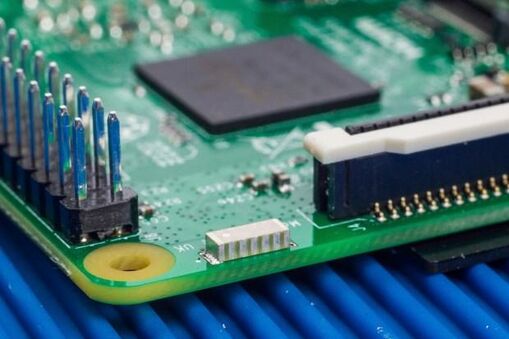
Compared to the Raspberry Pi, the Banana Pi's wifi signal seems extremely weak, but the Raspberry Pi actually has an on-board micro antenna (shown on the left below) and it works extremely well - the signal is a lot better than many home wifi routers. The Banana Pi boards don't come with any on-board antenna solution, and so an external antenna is necessary if the board is intended to be using the wifi for anything serious such as a hotspot. An antenna is attached via the on-board U.FL micro-connector shown in the photo below to the right.

Armbian headless installation
Armbian is a great source of up to date OS images with versions available for the Banana Pi series. But one problem with the default minimal server images is that they are not truly headless, you need to set a root password on the first boot before SSH logins will work. This is a big problem for us because we don't have keyboards and monitors lying around - occasionally we have a TV near by, but definitely no keyboards since we only use laptops, phones and tablets. This issue is regularly being raised by users, but the developers won't budge on it because their perspective is that providing a fully headless version out of the box would lead to their OS being used in malicious bot-nets.
However, since we have access to the full OS file-structure, we can use qemu and chroot to open a shell inside the file structure while it still resides on our local system. We can then set the root password before inserting the card into the Pi for it's first boot (see this Debian wiki page and final comments in this Armbian forum post for more detail).
Here's how we can do it where OS_PATH (highlighted) is the path to your mounted SD card or Armbian image file (see this if you want to mount and modify the image file). You could also do any other basic setup you may wish to do here too, such as adding a public key and changing over to key-based logins, or set up your networking details such as wifi access (this is done in /boot/armbian_first_run.txt which must be initially copied from /boot/armbian_first_run.txt.template).
apt install qemu-user-static
cp /usr/bin/qemu-arm-static OS_PATH/usr/bin
chroot OS_PATH
passwd root
...
exit
sync
Important: If you have an M1+ you need to add fdtfile=sun7i-a20-bananapi-m1-plus.dtb to your /boot/armbianEnv.txt file, otherwise it will be recognised as a model M1 with no wifi!
You can then power up with the card scan for you device on your subnet as usual and ssh into it with the updated details you provided (use your own subnet details).
nmap -sP 192.168.0.0/24When you ssh into the IP you'll be asked to create an initial non-root user.
Next it's a good idea to run through the awesome Armbian config utility to configure everything the way you want it. You can even choose to configure your wlan interface as a hotspot from here!
armbian-configBooting from a SATA drive
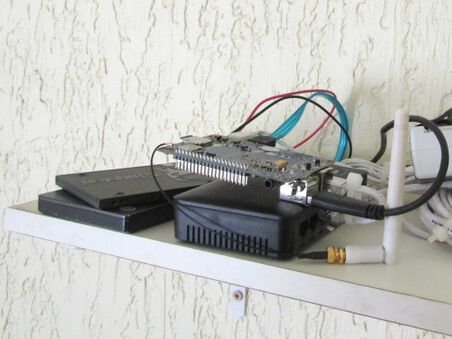
Using an SD card as the primary drive for the operating system has poor performance and is also not very reliable, because it can get corrupted easily if the device is spontaneously powered down. So if you have a board with a SATA interface, then using that for your root FS drive is a good idea. In the case of the Banana Pi you'll need a slightly non-standard SATA connector that uses a small connection to the 5v power supply rather than the usual Molex connector.
The board currently is only capable of booting from SD card, but you can reduce the role of the card down to handling nothing else but the boot process itself, and then have it switch over to use the SATA as the main partition containing the root filesystem. Switching the root FS over to the SATA drive was simply a matter of copying everything in the root partition over to the SATA drive (which was formatted as a single EXT4 partition), and then changing the rootenv parameter in the card's /boot/armbianEnv.txt to the UUID of your new SATA device. You should also update the UUID of the root mount point in the new device's /etc/fstab.
After you've completed those steps, reboot and then check if it's working using lsblk -o NAME,SIZE,MODEL,MOUNTPOINT or similar:
NAME          SIZE   MODEL                  MOUNTPOINT
sda           111.8G KINGSTON_SA400S37120G
 └─ sda1      111.8G                        /
sdb             1.8T ST2000LM003_HN-M201RAD
 └─ sdb1        1.8T                        /backup
mmcblk0        14.5G
 └─ mmcblk0p1  14.3G
zram0            50M                        /var/log
zram1         498.8M                        [SWAP]
If it's not working, you'll need to remove the card and change the armbianEnv.txt back from another computer before you can boot back in to find the problem. Here's some related links:
- https://forum.armbian.com/topic/329-moving-linux-to-sata-or-external-drive/
- https://forum.htpcguides.com/Thread-Problem-pointing-boot-to-hdd
- https://www.htpcguides.com/move-linux-banana-pi-sata-setup/
Useful Armbian commands
Monitor the power voltage:
while true ; do echo "$(awk '{printf ("%0.2f",$1/1000000); }' </sys/power/axp_pmu/ac/voltage)V"; sleep 1; done
What kind of device are you running?
sudo cat /proc/device-tree/modelThis is especially useful if you have an M1+ which, by default, may think it's just a wifi-less M1. The output of the command above shows "Banana Pi BPI-M1-Plus" for an M1+, or "LeMaker Banana Pi" for a plain M1. See the note in the installation section above for how to fix this if it's showing M1 instead of M1+.


