Fixing Beth's microphone
After fixing my laptop microphone last month, I finally got around to fixing Beth's one today. We very coincidentally both had exactly the same issue with our microphones both failing shortly after we started using them. I thought of a few things I could do better or more easily after doing my one.
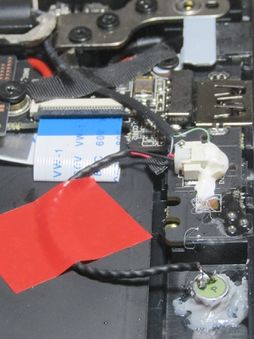
First, rather than solder the new microphone onto the circuit board connections, it's much easier to simply cut the wires that lead off to the existing failed microphone and connect those to the new one. That way the kill switch automatically works without any extra effort as well.
Another thing I found after fixing mine was that drilling the hole in the case was unnecessary - when I was talking to my parents to test the new microphone, I demonstrated my new "mute" button by putting my finger over the hole, but they said they could still hear me perfectly! So I didn't both even drilling a hole for Beth's, and sure enough it's fine without - it is very slightly muffled compared to mine, but perfectly fine for every day use.
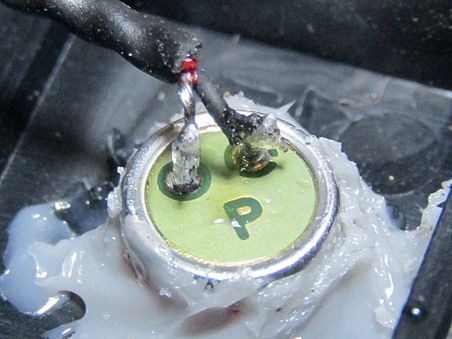
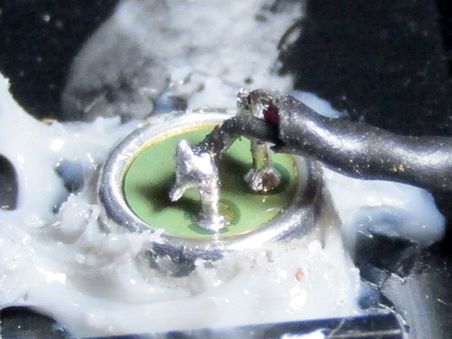
Finally I remembered we had some bonding stuff that's similar to silicone, but much firmer, so I decided to dab bits of that around the microphone to bond it to the case, rather than making a complicated housing for it. I took some close up pictures of the wire connections to the microphone contacts too, because even with my glasses I couldn't see if the joints were good enough - the whole microphone is just 5mm in diameter so it's very difficult to solder such small wires with a fat soldering iron and no magnifying glass!


