Difference between revisions of "Samsung ATIV Smart PC Pro (XE700T1C)"
(start info) |
m (→Replacing the SSD) |
||
| Line 2: | Line 2: | ||
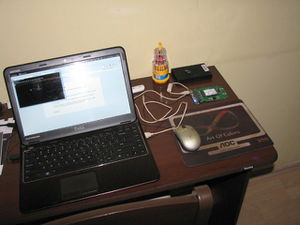
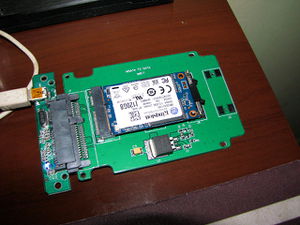
The first thing I wanted to do with the device even before turning it on was to get Linux onto it. Since I also wanted to replace the 64GB SSD with a new 128GB one I thought the easiest approach would be to make an exact replica of my current laptop drive on the new SSD before putting it in and that way I'd have the OS installed with all my data on it as soon as I first powered it up. I had already bought an adapter to allow me to connect the mSATA SSD to USB just in case I had trouble booting the new system from USB and had no other option other than this method of installation, so I first copied my drive across with the ''dd''. | The first thing I wanted to do with the device even before turning it on was to get Linux onto it. Since I also wanted to replace the 64GB SSD with a new 128GB one I thought the easiest approach would be to make an exact replica of my current laptop drive on the new SSD before putting it in and that way I'd have the OS installed with all my data on it as soon as I first powered it up. I had already bought an adapter to allow me to connect the mSATA SSD to USB just in case I had trouble booting the new system from USB and had no other option other than this method of installation, so I first copied my drive across with the ''dd''. | ||
{| | {| | ||
| + | |[[File:Duplicate drive onto msata ssd.jpg|300px]] | ||
|[[File:Duplicate drive onto msata ssd 2.jpg|300px]] | |[[File:Duplicate drive onto msata ssd 2.jpg|300px]] | ||
| − | |||
|} | |} | ||
Revision as of 21:10, 27 February 2014
Replacing the SSD
The first thing I wanted to do with the device even before turning it on was to get Linux onto it. Since I also wanted to replace the 64GB SSD with a new 128GB one I thought the easiest approach would be to make an exact replica of my current laptop drive on the new SSD before putting it in and that way I'd have the OS installed with all my data on it as soon as I first powered it up. I had already bought an adapter to allow me to connect the mSATA SSD to USB just in case I had trouble booting the new system from USB and had no other option other than this method of installation, so I first copied my drive across with the dd.

|

|
The next step was to take the unit apart and replace the drive. I found a good video here which I followed and got it opened successfully in a few minutes. The guy in the video used a guitar pick, but I found a credit card was fine - one that had expired is best as you may damage the edges.
Xe700t bios settings.jpg Replacing xe700t ssd 2.jpg Replacing xe700t ssd.jpg


