Samsung ATIV Smart PC Pro (XE700T1C)
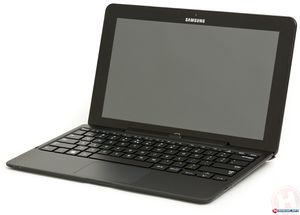
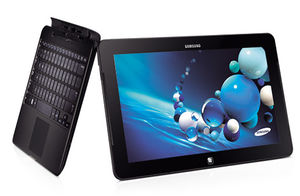
My latest computer as of 2014 (my seventh laptop) is a Samsung ATIV Smart PC Pro (XE700T1C). I wanted to find something that was affordable, reasonably powerful and Linux friendly. I specifically wanted it to work well as both a notebook for home, and a very portable tablet for taking into town and working in cafes, bus stations and hotel lobbies etc.
Contents
Replacing the SSD
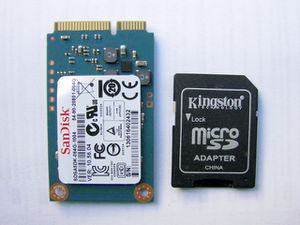
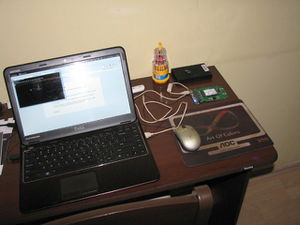
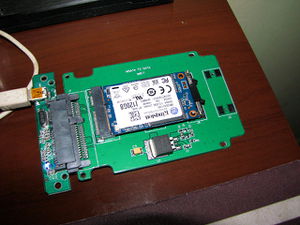
The first thing I wanted to do with the device even before turning it on was to get Linux onto it. Since I also wanted to replace the 64GB SSD with a new 128GB one I thought the easiest approach would be to make an exact replica of my current laptop drive on the new SSD before putting it in and that way I'd have the OS installed with all my data on it as soon as I first powered it up. I had already bought an adapter to allow me to connect the mSATA SSD to USB just in case I had trouble booting the new system from USB and had no other option other than this method of installation, so I first copied my drive across with the dd command. It turns out there's no problem booting the system from USB, but it's still useful to be able to use my mSata drives via USB or to use them in normal 2.5 inch bays.
|
|
|
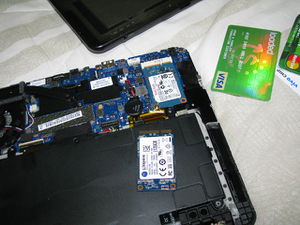
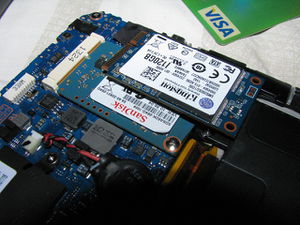
The next step was to take the unit apart and replace the drive. I found a good video here which I followed and got it opened successfully in a few minutes. The guy in the video used a guitar pick, but I found a credit card was fine - one that had expired is best as you may damage the edges.
|
|
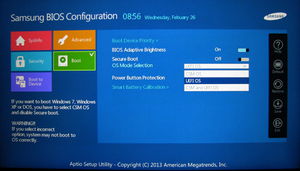
Then for it to be able to boot into Linux you need to enter the BIOS configuration by pressing the F2 key when the unit is powered up, then disable the secure boot protocol and change from UEFI to CSM for OS mode. If you want to allow booting from USB drives you also need to disable the fast boot option in the advanced settings
|
USB LAN
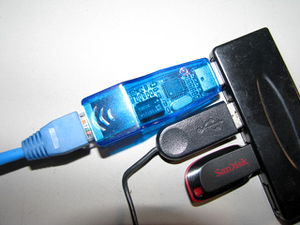
Like most tablets and mobile devices, there's no LAN port because it's too thin for one. But when it's being used in notebook format, a LAN port is often preferable to wifi. This is especially the case for us out here on the land because running a wifi router is over ten watts of unnecessary power wasted, and also a pointless addition of radiation into our local environment. My solution is to use a USB LAN adapter which only costs about $10 and practically all of them are supported out of the box by Linux with no drivers or downloads necessary. One issue we did have though was that the USB adapters are unable to drive a long cable, and we needed it to drive a full length 100m segment, but this is easily solved by installing a local LAN hub which we've been wanting to have anyway - a LAN hub typically uses less than 1 watt of power which is quite acceptable. Another thing I like to do is use a USB hub so that I only need to have one thing plugged into the tablet's USB, and then I can have many permanent devices plugged into the hub such as mouse, USB LAN, external drives etc.
Touchscreen
Everything worked perfectly when the machine booted into Debian 7 except the touch screen. I know that it works because you can use it to configure the BIOS. I found by searching dmesg that it's an Atmel MaXTouch Digitizer and that there's a kernel module called atmel_mxt_ts that should handle it but even though it's being discovered as a USB device, it's not being connected to an input event or added into xorg.conf.
Linux kernel 3.3+
It turns out that the touchscreen requires a kernel version of at least 3.3, but Debian 7 only use 3.2. The most recent Ubuntu (which at the time of writing is 13.10) uses 3.11 and the prior two use 3.8 and 3.5, but unfortunately only the LTS versions of Ubuntu are stable, the others all tend to have major usability problems and the last LTS is 12.04 which like Debian is on kernel version 3.2. I tried the most recent Ubuntu anyway just in case it happened to work for me, and although the touchscreen worked out of the box, it was too buggy and crashy for practical use.
So I decided to look at Linux Mint which I've been wanting to try for a while and it turns out that the latest stable version uses kernel version 3.11 (even the two stable versions prior to that use more recent kernels than 3.2). After using it for a week or so I'm finding it pretty good, it's stable and snappy and everything's worked out of the box. It's a little old-school following the Gnome 2 interface paradigm, but I'm finding that to be ok.
Onboard virtual keyboard
For the on-screen keyboard I'm using Onboard which is the one used by Ubuntu by default which is so far the only one I've found that has a CTRL key that works with mouse clicks. It also offers virtual keys for right mouse clicks which is very useful too.
Password entry problem
One problem I haven't found out how to solve yet is that the virtual cannot be used to enter passwords since the password dialog makes all other windows (including Onboard) inaccessible until after the password has been entered or cancel clicked. The only solution I've found to this is to select in the Gnome preferences to make password dialogs into normal windows, but that options doesn't seem to be present in Linux Mint. This Mint forum entry is about this issue but the suggested solution doesn't do anything for me.
Flick gestures
To enable flick gestures for reading web pages, I've installed the Grab and Drag extension in Firefox which works well, but unfortunately the momentum option doesn't seem to do anything.
Screen rotation
When the screen is rotated (at least on Mint 13) the pointer does not also rotate making the touchscreen, stylus and mouse (if using a bluetooth mouse that works in tablet mode) unusable. I was able to make a short script that toggles the rotation of the display and the touchscreen input using the xrandr and xinput commands. The normal method of rotating the display in the system preferences only seems to adjust the output (the xrandr part), but not the input devices which requires a different value for the Coordinate Transformation Matrix property of the xinput device. The script is in the OD tools repository here and can be added to the panel or main menu for easy access.
I recently noticed that the stylus wasn't being rotated and found that this (and the eraser) needed to be set separately with the xsetwacom command. Also I changed the rotation from clockwise to anticlockwise because the fan vent was on the side that I was holding it by went in portrait orientation. There's some more information on the various matrix settings for different orientations here.
Useful extensions and apps
- Cheese: app installed via software manager for taking photos
- Default FullZoom Level: Firefox addon so to allow the default zoom size to be 125% since the screen is very hi-res
- Grab and Drag: Firefox addon to add flick gestures to web pages
SSD Optimisation
I've had one too many mechanical disk failures and have finally decided to move over to SSD. They still have a long way to go as a technology since they still suffer from the major problem of flash technology in general which is that each memory bit can only be written to a thousand times (3 thousand on the most recent technology). So I'm just going to get a small cheap one initially and hopefully in six months or so they'll be longer lasting and more practical sizes. I've started with a 120GB Samgsung 840 series, for these reasons. Most of the following optimisation tips are taken from SSD optimisation in the Debian wiki, and another good artile here in the Arch Linux wiki.
Fixing bluetooth network connection crash on resume
For some reason the entire system freezes when resuming from standby if it was connected to the net via bluetooth. It's just a matter of disconnecting before going to standby, but I nearly always forget, so we can have a script do this by putting it in /etc/pm/sleep.d so it will run on standby and resume. The first (and only parameter) is set to the action that is occurring, either "suspend", "hibernate", "resume" or "thaw", and we can check ifconfig to see if bnep0 is present to know if there is a current network connection over bluetooth. The disconnection itself can be done using hciconfig.
#!/usr/bin/perl
qx( hciconfig hci0 down ) if $ARGV[0] eq 'suspend' and qx( ifconfig | grep bnep0 );
Note: use hciconfig -a to find out what hciX device your bluetooth connection is on, and ifconfig when connected to see what network interface name it has.
