Google Maps
Contents
- 1 API key
- 2 Where did "My Places" go?!
- 3 Working with the API
- 3.1 Semantically annotating the infobox template
- 3.2 Retrieving the location data via AJAX
- 3.3 Creating a custom popup box using the overlay method
- 3.4 Populating the popup box with data via AJAX
- 3.5 Selecting markers with SMW queries
- 3.6 Finishing up phase one
- 3.7 Marker clustering
- 3.8 Filter form
- 3.9 Location caching
- 3.10 Finishing off phase 2
- 3.11 Further improvements that could be made
- 3.12 Location entry and map interaction job
- 3.13 Street view
- 4 See also
API key
The maps API now requires a key to use which you can get from here. The key can then be configured in the Google console.
Where did "My Places" go?!
Google have "upgraded" their map to a much cleaner and simpler interface by removing everything useful and keeping all the gimicky and useless crap. Now it seems that there's no way to place informative markers onto a map and send it to people - pretty much the most important use of the maps system. Fortunately there is a way to get the old functionality back, at least for now. You use an old link that contains markers that you've sent in the past like this and if you were the one who created it, then you can remove, ad or edit markers and then share another link with the updated information.
They'll probably remove this ability at some point since they seem dead-set on making the maps system as useless as possible. It wouldn't be too hard to replicate the functionality on your own server though using the code outlined below to create markers and overlays containing the editable information.
Working with the API
This was job which I did at the beginning of 2012 for Trail WIKI, I'm documenting it here because it involved many different interesting aspects and also included some useful information which will help with later jobs.
The wiki contains many pages which represent hiking trails. It uses an infobox template so that various information about each trail such as its distance, elevation and other attributes can be contained in a structured way in the article.
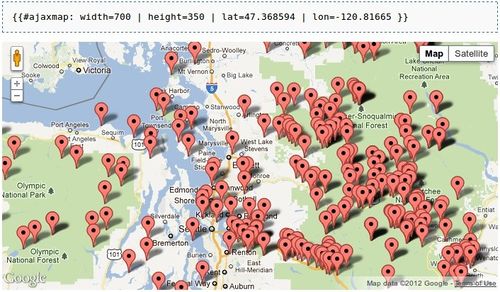
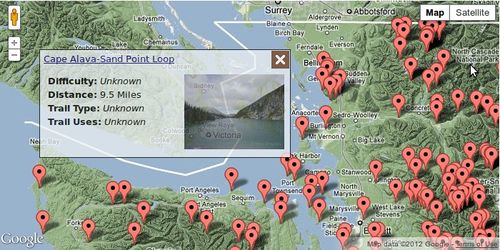
On the main page is a Google map which has markers for all the trails, and when one is clicked a popup is revealed containing a link to the associated trail article.
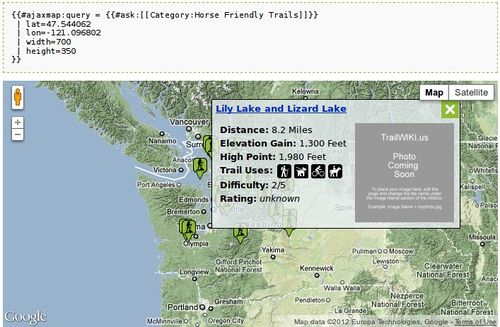
The client wanted to have this map functionality extended such that the infobox that pops up is customised to the style of the site and contains some of the key information from the trail article's infobox. Also he wanted to use the Semantic Maps extension so that he could have other maps throughout the wiki which shows only very specific sets of markers such as trails with a certain region or above a certain elevation.
Another issue is that the wiki will eventually contain thousands of trails, so the maps need to load the trail location data after the page has loaded, and the popup boxes in the markers need to load their content on-demand too.
Semantically annotating the infobox template
The infobox template which defines an article in the wiki as being a trail needs to be semantically annotated so that specific queries involving locations and categories can be made such as selecting all maps which are within X miles from Y. Annotations in the template such as the following ones are used to make the parameters of the trails into proper data that can be queried and reported on.
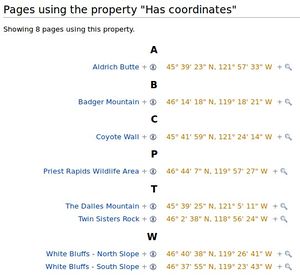
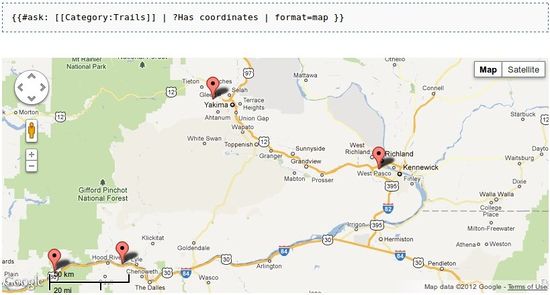
[[Has coordinates::{{{Latitude}}},{{{Longitude}}}]]These properties can then be seen in the wiki as shown below. On the right is the an example of the existing Semantic Maps extension which generates maps from the semantic data in the wiki.
|
|
Retrieving the location data via AJAX
The next step was to set up a new parser-function, #ajaxmap, which uses jQuery to make requests for trail information after the page loads. This is because our map will have custom overlays containing much more information than just the locations. This would cause the page to load very slowly if all this had to be sent with the initial page source - not to mention that just the raw location data for thousands of trails would slow the page down a lot by itself. The new parser-function depends on the standard Maps extension to obtain all the necessary Google maps javascript and integrate it with the MediaWiki environment, but it then uses its own script to create the ajax-based maps once these resources are in place.
Here's the request side from the JavaScript using jQuery's ajax method to ask for the location data in JSON format:
var data = { action: 'traillocations' };
$.ajax({
	type: 'POST',
	url: mw.util.wikiScript(),
	data: data,
	dataType: 'json',
	context: opt,
	success: function(json) {
		this.locations = json;
		window.updateMarkers.call(this,{});
	}
});
And here's the corresponding MediaWiki code. Rather than use the AjaxDispatcher (using action=ajax), we use a custom action so that all the MediaWiki objects are fully initialised and available.
function onUnknownAction( $action, $article ) {
	$wgOut->disable();
	header( 'Content-Type: application/json' );
	if( array_key_exists( 'query', $_REQUEST ) ) $query = explode( '!', $_REQUEST['query'] );
	else $query = false;
	json_encode( self::getTrailLocations( $query ), JSON_NUMERIC_CHECK );
}
Creating a custom popup box using the overlay method
I started with this script from the examples in the Google documentation.
Populating the popup box with data via AJAX
To help reduce page load time further, I've made the detailed data for each trail only load on demand via AJAX.
InfoBox.prototype.loadContent = function( titles, div ) {
	for( i in titles ) {
		var target = document.createElement('div');
		div.appendChild(target);
		$.ajax({
			type: 'GET',
			url: mw.util.wikiScript(),
			data: { title: titles[i], action: 'trailinfo' },
			dataType: 'html',
			success: function( html ) { this.innerHTML = html; },
			context: target
		});
	}
};
Selecting markers with SMW queries
This was achieved by allowing a query parameter to be added to the #ajaxmap parser-function that contains a SMW #ask query (or in fact any other kind of query that produces a list of title links as a result such as DPL). These article titles are then extracted out of the resulting list and included in the ajaxmap_opt array defined in the JavaScript for that map. The JavaScript Ajax request then includes these titles in its query parameter when it asks for the location information.
This is not perfect because the list of titles should not have to be sent to and from the client, it would be better for the Ajax request to send just an identifier that the PHP can use to perform the #ask query then rather than performing it when the parser-function was first expanded. But unfortunately the project budget won't allow for this aspect this time round.
Finishing up phase one
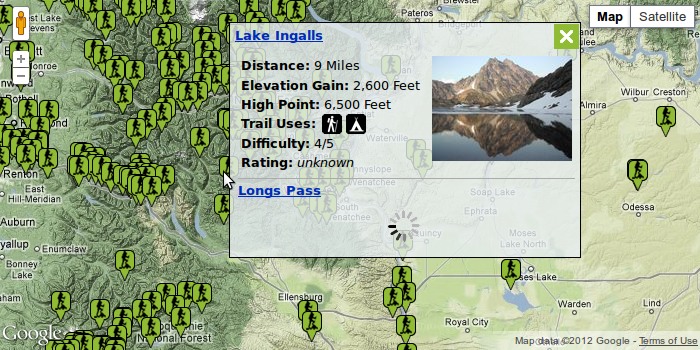
Here's a picture of the final result of the first phase of development. The image shows an infobox for a location that contains two trails, the details for the second trail are still in the process of loading via AJAX.
Marker clustering
The Google MarkerClustererPlus is initialised in the updateMarkers method after the markers have been created for the locations and filtered according to the settings in the filter form. It first clears any markers if the clusterer is already initialised, because the updateMarkers method is called whenever the filtering settings are changed. The clusterer doesn't need to be cleared when the zoom level changes, only when the set of markers that the clustering applies to changes.
if( clustering ) {
	if( 'clusterer' in this ) this.clusterer.clearMarkers();
	this.clusterer = new MarkerClusterer( this.map, markers, {
		gridSize: 30,
		maxZoom: 12,
		imagePath: '/path/to/clusterer/images/prefix'
	});
}
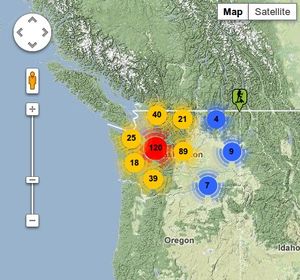
|
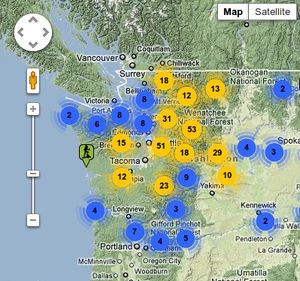
|
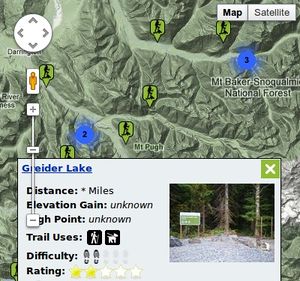
|
Making a custom clusterer
One reason to use a custom clustering solution would be if you wanted part of the clustering done on the server-side so that only a limited sub-set of the marker data need be sent to the client at page-load.
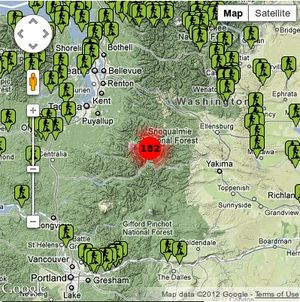
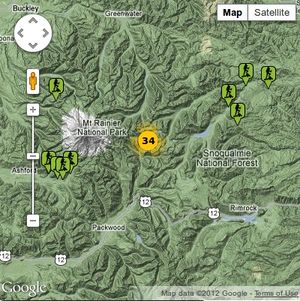
Many of the markers are too close together to be able to be separately clicked or moused-over, so these very dense areas of markers can now have named clusters defined for them. Each cluster is centred at a specific location, covers a specified radius and works of a specified zoom-level range. If there are few enough trails in a cluster, then clicking on it will bring up the trail information as usual, but if there are too many, then just the headings will be rendered in the infobox.
I looked at the Google Marker Clusterer, but found it to be not quite configurable enough for our needs. We want to be able to cluster just specific groups of markers and don't want general grid-based clustering.
The clustering has been added into the updateMarkers method which is called when filtering is changed, and is now also called in response to a zoom event by adding the following listener to the map:
google.maps.event.addListener(opt.map, 'zoom_changed', function() {
	window.updateMarkers.call(window.ajaxmap_opt[this.id],{});
});
The cluster marker icons require a textual label that shows how many markers the cluster represents. I used the MarkerWithLabel class because it integrates with existing code nicely by sub-classing the standard Marker class. Here's how I used it in the clustering code:
cluster.marker = new MarkerWithLabel({
	title: cluster[0] + ' (' + titles.length + ' trails)',
	titles: titles,
	position: new google.maps.LatLng(cluster[1],cluster[2]),
	icon: icon,
	map: this.map,
	opt: this,
	labelContent: titles.length,
	labelAnchor: new google.maps.Point(x,9),
	labelClass: "ajaxmap-cluster",
	labelInBackground: false,
});
google.maps.event.addListener(cluster.marker, 'click', function() { new InfoBox(this); });
Here's some images showing a test cluster at a few different zoom-levels:
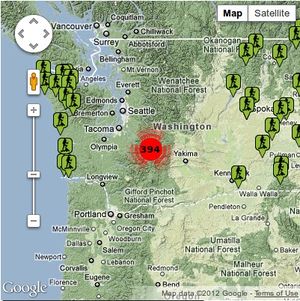
|
|
|
Filter form
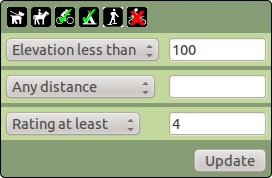
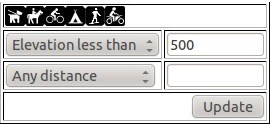
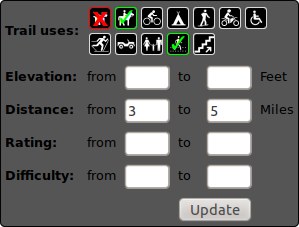
A filter form has been added so that, if enabled, a form is available that allows users to tick or un-tick options such as "Dog friendly", or specify parameter ranges such distance or elevation, and the markers will be added/removed dynamically to match the query. Here's some images of the filter form as it's design progressed.
|
|
Location caching
Obtaining the location data for many hundreds of trails takes 10-15 seconds to return from the server. This is because the data for each trail needs to be extracted from the wikitext content of each trail article. So to speed this up, an SQL table was created to cache the location data. The getLocation method first checks if the requested trail has its location stored in the cache, and returns the data straight away if so. If not, it then calls the more expensive getTrailInfo method which reads the article and extracts the data from the wikitext content.
+------------+------------------+------+-----+---------+----------------+
| Field      | Type             | Null | Key | Default | Extra          |
+------------+------------------+------+-----+---------+----------------+
| twlc_id    | int(11) unsigned | NO   | PRI | NULL    | auto_increment |
| twlc_trail | int(11) unsigned | NO   |     | NULL    |                |
| twlc_lat   | double           | YES  |     | NULL    |                |
| twlc_lon   | double           | YES  |     | NULL    |                |
+------------+------------------+------+-----+---------+----------------+
The cache system has to tie into a couple of hooks so that the cache can be updated when trail information is created, deleted, or modified. The RevisionInsertComplete hook is used to detect if newly saved revisions have created a new trail or made any changes to the location of an existing trail. Both this hook and the ArticleDeleteComplete hook also do a general check to remove any location data from the cache that no longer has a corresponding trail article in the wiki. This could occur from articles being deleted or trail infobox templates being deleted or overwritten.
// First attempt to obtain the title from the DB cache
$dbr = wfGetDB( DB_SLAVE );
$id = $title->getArticleID();
if( $row = $dbr->selectRow( $table, 'twlc_lat, twlc_lon', "twlc_trail = $id" ) )
	return array( $row->twlc_lat, $row->twlc_lon );

// Not in cache get from full trail-info and store in cache
$data = self::getTrailInfo( $title );
$dbw = wfGetDB( DB_MASTER );
$dbw->insert( $table, array(
	'twlc_trail' => $id,
	'twlc_lat'   => $data['Latitude'],
	'twlc_lon'   => $data['Longitude']
) );
The trail location list now returns the data in a fraction of a second even for many hundreds of trails. It could still be improved more by making use of the modified HTTP headers to tell the client that it can locally cache the data and check the modified header to check if the entire data-set needs to be transferred.
Finishing off phase 2
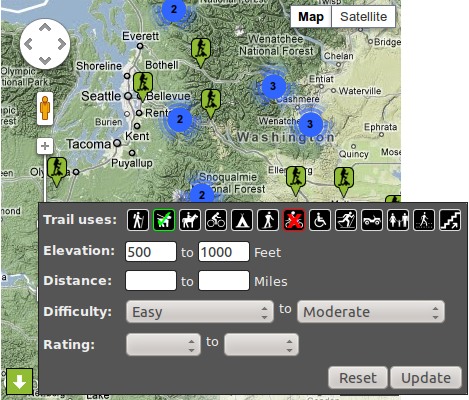
Here's an image of the final result of phase 2 including a button to show and hide the filter form, and a reset button to clear the form and show all the trails again.
Further improvements that could be made
- The filtering should be stored in the map-opts as current_filter rather than as a parameter in updateMarkers, because only the filter form knows these parameters - any other method that needs to call updateMarkers will not know what parameters to pass.
- Store article lists from ask queries in DB so the lists aren't sent to and from the client
- Cache all trail data, not just location data
- Use HTTP "modified" headers to reduce data-transfer of trail info
- Separate out the trails that start at identical locations into a circle when at maximum zoom so they can be clicked on separately
- The check for unused location data in the cache is inefficient - it should be done with one SQL query using a left join not a PHP loop
Location entry and map interaction job
This job required that input fields for country, city, street etc use the Google Maps API to enable auto-completion of the fields and to update a map of the location as the fields are populated. This ensures that the inputs are all valid and correctly spelled and that the resulting address has valid map coordinates. The fields must be arranged from the most general (country) first, down to the most specific (street), so that as each is populated in order, the auto-completion of the next is restricted to the general area determined by the previous fields.
Street view
Pointing the camera at a marker
When using the latLng location of an address to activate street-view the orientation is usually wrong - i.e. the POV is facing seemingly in a random direction rather than showing the selected address.
I found the solution here. The latLng of the required address and the latLng of the panorama location (the position of the streetview car from where images are shot) are not the same, and the API does not set the heading in the right direction of the address latlng, you will have to set it yourself using something like this:
var loc1  = map.getCenter();
var sv    = map.getStreetView();
var svSrv = new google.maps.StreetViewService();
svSrv.getPanoramaByLocation(loc1, 40, function(data, status) {
	if(status === google.maps.StreetViewStatus.OK) {
		var loc2 = data.location.latLng;
		sv.setPosition(loc2);
		sv.setPov({
			heading: google.maps.geometry.spherical.computeHeading(loc2, loc1),
			zoom: 1,
			pitch: 0
		});
		sv.setVisible(true);
	} else alert('no street location possible!');
});
Custom street views
You can create your own panorama using the v3 API. The official documentation is here. Also this tutorial is good and this Stack Overflow item has some good related links such as this example. See also the following related links.
- Hugin - libre panorama stitcher allowing photos from normal cameras with auto white balance etc
- Panorama tools - libre toolset for all your panorama needs
Each Street View panorama is an image or set of images that provides a full 360 degree view from a single location. The StreetViewPanorama object uses images that conform to the equirectangular projection (see also Panotools wiki article), also called the "non-projection", or plate carrée, since the horizontal coordinate is simply longitude, and the vertical coordinate is simply latitude, with no transformation or scaling applied. Such a projection contains 360 degrees of horizontal view (a full wrap-around) and 180 degrees of vertical view (from straight up to straight down). These fields of view result in an image with an aspect ratio of 2:1. A full wrap-around panorama is shown below.
Overlays within street view
Info windows similarly may be opened within a Street View panorama by calling open(), passing the StreetViewPanorama() instead of a map. See the documentation here.
Markers at different elevations
todo...
