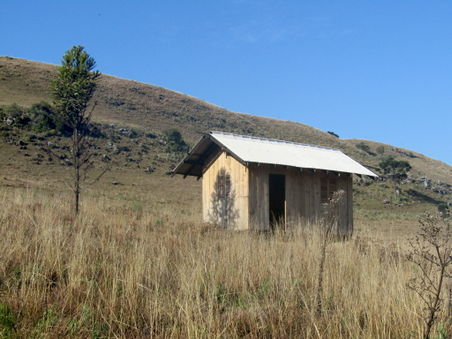
Our second house
Contents
Plans
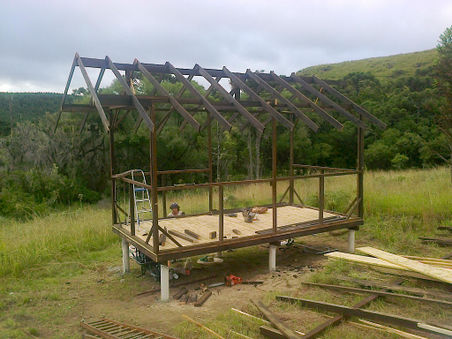
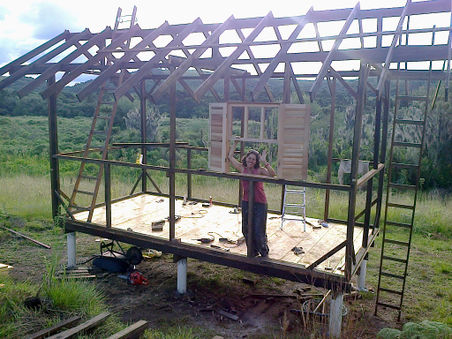
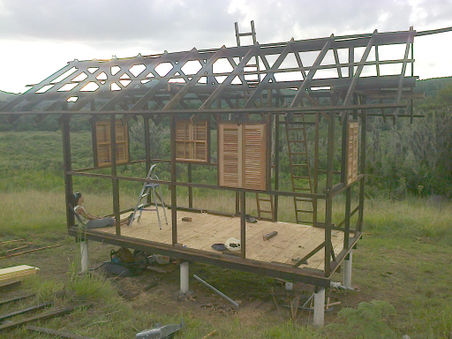
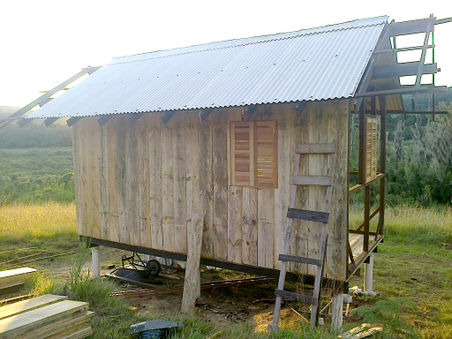
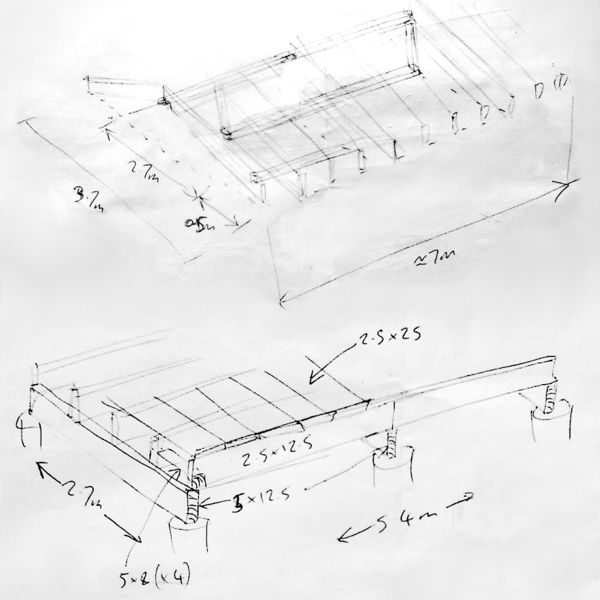
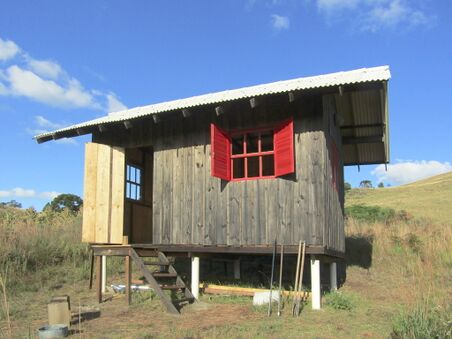
This house is a pretty similar design to our first one, a tiny 2.7x5.4 metre single room, so we didn't feel that much of a plan was necessary, but we did have to scribble a table napkin plan to calculate what materials we needed. We're doing a few things like the roof structure a little bit differently to avoid the problems we ran across in the first house, and we decided to buy ready made window frames with shutters this time - we got four, but we're not sure where they're going to go yet, we're planning a lot of it as we go :-)
Note: Be sure to buy about 25% more wood than necessary because a lot of the wood from these cheap places is bent or damaged,
Preparing the work area and wood
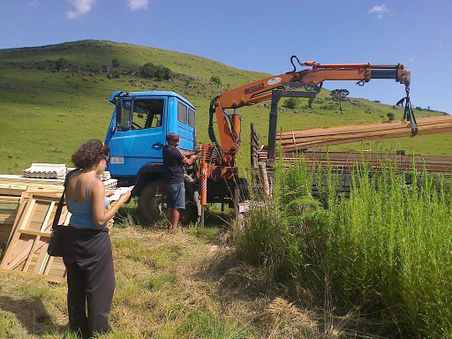
Another important aspect in the planning stage is to decide where your work area is going to be, i.e. where all the wood will be stored that is easily accessible from the house with plenty of space for cutting etc. Ensure the truck can easily reach your area and park along side it to unload the materials there and has space to turn around etc. Unfortunately our area is too uneven and they guy didn't want to bring the truck down there so we have to manually carry the materials down the hill about twenty metres.
We bought really cheap wood (pine and eucalyptus) which is untreated, so the first thing we do is paint it with burned oil which is really good at stopping bugs from eating it. You can get burned oil for nothing or dirt cheap at most gas stations.
Foundations
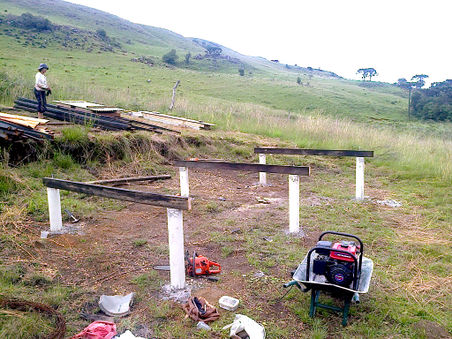
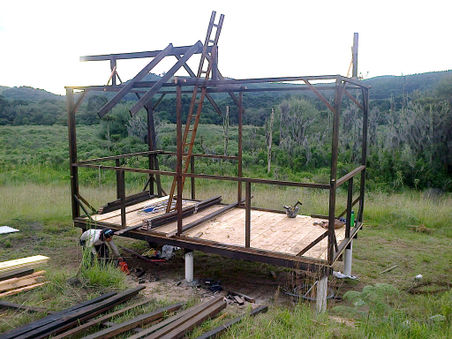
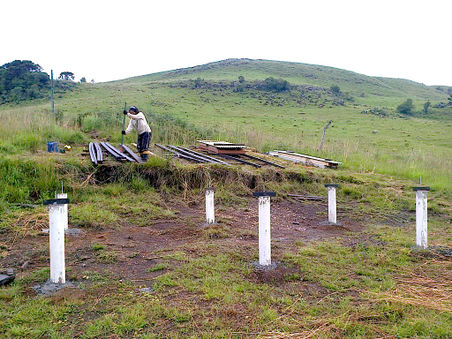
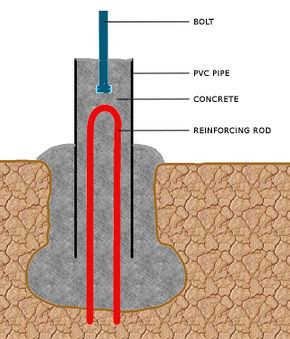
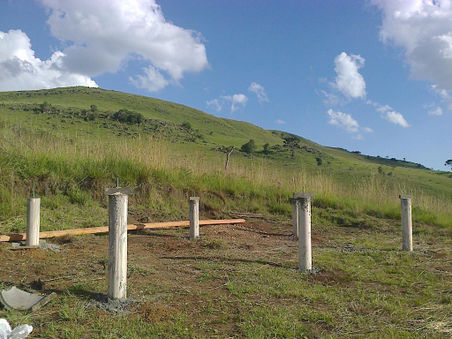
We made six foundations poles using PVC pipe filled with concrete as shown in the first image below. Unfortunately the south-east (closest to Vladimirs place) and the north-west poles have no reinforcing - because we completely forgot about it! And the middle pipe on the south side goes all the way to the bottom of the hole, but apart from those problems all went well. We used 75Kg of cement, 150kg of sand and an extra 50kg of large stones. The cement is pretty bad quality as it's a couple of years old, and the sand too is from the river containing a fair bit of mud, so this concrete wouldn't be suitable for structure, but hopefully it'll be fine for foundations where the force is almost all downwards and it's contained within the PVC pipe to prevent it from bending if any cracks were to form in it.
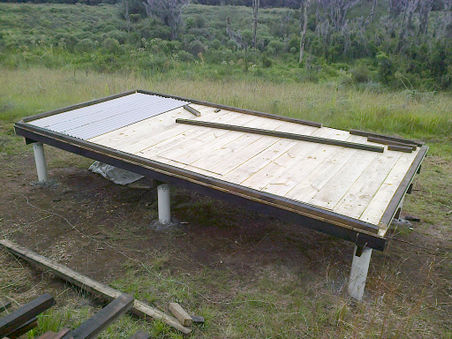
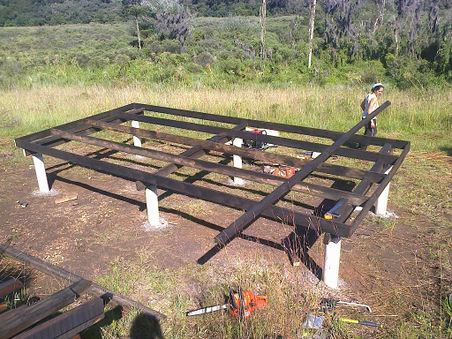
Next we put three large 12.5x5 pieces across each pair, and then five 12.5x2.5's along the whole length on top of these. We used short pieces of 5x8 to keep them spaces properly and to connect them down to the 12.5x5's. We used 22x54 nails to connect the 5x8's to the 12.5x5's and 19x34's to connect the 12.5x2.5's to the 5x8's. Getting all the 12.5x2.5's nice and vertical and in the correct horizontal position can be tricky, so we put a horizontal piece of 12.5x2.5 on each end first (using 17x27 nails) to make a kind of box before measuring, cutting and connecting all the pieces of 5x8.
Note: I think on the next house we'll go the more western style of having a grid of just 12.5x5 all at the same level, instead of having 12.5x2.5's on top of 12.5x5's. Having the large ones on both directions makes it easier and gives more options for connecting the frame.
Floor & frame base
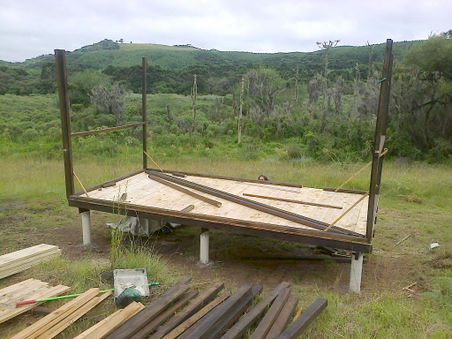
To do the floor, we positioned all the pieces first to find ones that lined up nicely and remove ones that were too rough or bent. Then after nailing an end one in place, we then sat on top of the loose ones, one of us on each side and nailed one end each, pushing each piece tightly into the prior one, we used three 17x27's for each line formed by the 12.5x2.5's below.
The frame base is the 5x8's laid down around the edge to support the frame. These may be on top of the floor boards or around the edge of them depending on the foundation design. ours are on top. They should be bolted to solid 5x8 or large foundation pieces, in our case since we only have the 12.5x5's below we needed to add some 5x8 pieces to bolt the frame base pieces into. If the wood is very bent like ours, then first you need to secure the end points in exactly the right place and then force the middle into position and clamp it to drill the bolt hole. You can hold a piece of string at each end and pull it tight to check if the wood is straight.
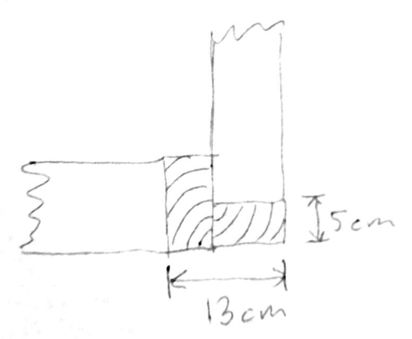
Note the gaps in the corners, these are for the vertical frame pieces which will be an L-shape, you can either measure or position some short bits of 8x5 in place to get these gaps the right size. The diagram below shows the view downwards onto a corner demonstrating how the 8x5's are formed into an L-shape. This is done both for strength and to ensure that all the sides have a full 8cm width of vertical frame to attach to. In our case it also helps us make verticals that are less bent!
Frame
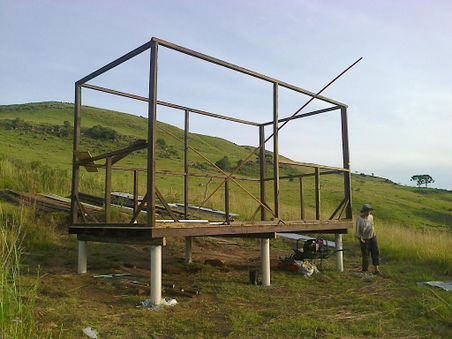
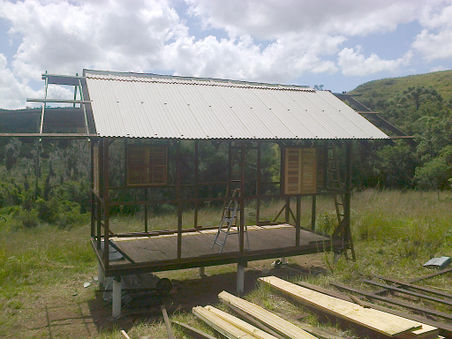
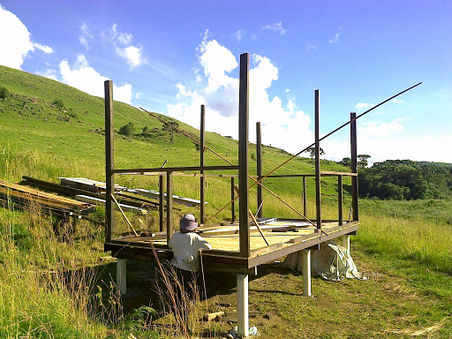
The first part of the frame is to get the verticals in place and fixed temporarily with pieces of scrap wood nailed in at 45 degrees, use the spirit level to ensure the vertical is actually vertical when you hammer the 45's in. We attached the horizontal piece that will support the window to two verticals to make an "H" shape, then lifted it into place with one of us on each side, then one of us hammered the bottoms in while the other held it steady, then the 45's went in to hold it at the right angle.
When dealing with these bent pieces it's best to have it bend inwards in the middle and outwards at the ends, because the horizontal piece in the middle can compensate and push the bends back out, while the nails at the top and bottom are perpendicular to the force of the bend so can resist the movement easily. See the section at the end about how to deal with bent wood for more details and diagrams.
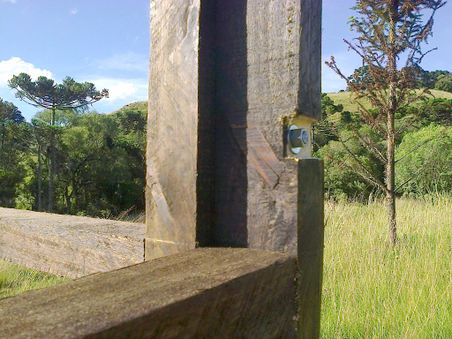
The "H" frames only form one part of each vertical "L", so after the H's are in place, the second vertical 8x5's have to be placed up against the first ones. Since the wood is very bent they need to be held in place up against their partner 8x5 with a G-clamp and then bolted into place. The outside bolt needs to be sunken in since wall panels will need to be nailed onto that surface, the inner ones can stick out since they'll be inside the wall. To allow the bolt to sink in, the best way is probably to drill about 1cm deep with a drill bit of about 2cm diameter, but we hadn't brought our large drill bits to the work site, so we just cut a notch with the chainsaw :-)
The next part is to get the two 8x5 vertical in the middle up and the mid-way horizontals connecting all around (except where the door will be).
Ceiling
Steps
Building with bent wood
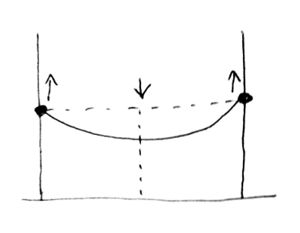
Building with bent wood adds a whole new dimension to the logistics required for the project. The main problem is if your large pieces used for the frame are bent. First, try to sort the wood out into least bent to most bent and use the most bent ones to be chopped up and used where you need short pieces. Also note in which direction the pieces are bent, when they're bent in their stronger dimension, that's more of a problem to deal with and best not used for critical frame pieces. Here are two examples of how wood that's been in the weaker dimension can be used in the frame.
This first example shows how you would go about using a bent piece of wood for a horizontal frame component. The solid lines show how the wood is at the beginning, and the solid dots show where the wood is attached firmly. The dotted lines show a vertical piece insert under the bent piece forcing it up into a straight position. The arrows show the direction of forces that the bent wood applies after this vertical piece has been added. Since the fixed ends of the bent piece are nailed in with nails that are perpendicular to the force they will easily be able to resist the force.
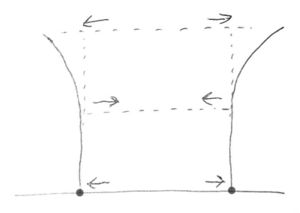
This second example is more complicated, it shows how two bent vertical pieces can be made straight by having horizontal pieces between and above them (the horizontal dotted lines). This was the situation for us when we made the "H" shapes on the ends of the house described above. The bent verticals are strongly fixed at the bottom, and the vertical pieces are oriented such that their bends are directed outwards.
When the tops of the verticals are forced into the correct position by the horizontal piece above them, the middle portions of the bent pieces tends inwards, but the horizontal piece in the middle doesn't allow this and they become straight. The vertical dotted lines are the final positions of the bent pieces, and the arrows show the forces that the bends are applying after they're forced into a straight shape. The nails in the top horizontal piece go downwards into the ends of the verticals, so that they're perpendicular to the direction of the bending force, and thus easily able to resist it.
Nails
We use two 22x54 for connecting 8x5 or larger frame pieces together when the strength is critical, two 19x34 if not so critical, sometimes one of each. We use 19x34 for smaller pieces going into larger pieces (it's best to drill a whole in a smaller piece before nailing with a 19x34 if the hole is near the end). We use 17x27 for all smaller pieces connecting to other smaller pieces. All the floor boards are done with 17x27 since they're nailing into 12.5x2.5, but all the wall boards are 19x34 because they're nailing into 8x5.
We used about 15kg of nails, 2kg of 22x54, 5kg of 19x34 and 5kg of 17x27 and a couple kg of roofing nails.
Lessons learned
- Use 12.5x5 for the whole top frame because it gives plenty of space to hammer the wall boards on to and means that the extensions are easy as they're also 12.5x5
- Use a grid of 12.5x5 for the bottom instead of rows of 12.5x2.5 on top of perpendicular rows of 12.5x5
- Put the vertical fatties for the windows in after the wall boards are started so that the windows can be positioned to avoid complicated cuts into the wall boards.
- The end walls can be done a easier and nicer looking way where the top above the roof line comes down over the main wall level (will add photos of some methods that look nice)
- Ensure the frame height matches the wall boards so that there's plenty of frame behind them but not too close to the ends, and also that the roof frame isn't interfering with any of them requiring notches to be cut into them.
- Put the walls on before the roof so that it's easier to access the top of the wall to hammer nails in (unless you have easy access to the top with correct size ladders etc).
- Put the walls on before the windows so that it's easier to cut the holes in the wall to the exact size of the window.
- Use aluminium capping, all the corrugated pieces are horrible to install and leak.
- Make sure you have enough nails and bolts before your start!
- Check prices for wall boards, there's options for rough ones or smoothed ones, in some places the difference is barely perceptible, in others it's a huge difference in quality, in some places the prices are very different and some places not. In the place we ordered to wood for this house from, the difference was very noticeable, but the price was almost the same so we should have got smoothed ones for everything not just floor.
- Why make a complicated L-shape for the corners, just use 8x8's for those.
