User:Cyrusty/LAMP
Contents
Learning the LAMP stack
My first project is to learn the LAMP stack, I'm writing the LAMP article as I learn more about it.
Local machine
First I downloaded Linux Mint 18 (Cinnamon) from their download page and installed Rufus on my local Windows machine (an application for Windows to format and create a bootable USB drive) to put the Mint 18 ISO on my 8GB USB. Goodbye Windows it was!
Once Mint was installed I clicked on Menu at the bottom and opened software manager then searched for and installed Nginx (which I'll be learning to use first before Apache). I also searched for MariaDB in the software manager and installed this on Mint.
Server
Nad has set up a domain and small server for me at cy.rusty.space. The first thing will be to install a LAMP stack on this server by learning the basic aspects of the Install a new server procedure.
Lesson #1: Setting up the essentials for my server
On Nov 24th 2016, Nad guided me through a lesson over skype which started by creating an RSA key to get into my server with. This creates two files, id_rsa.pub and id_rsa, the first one is like a padlock and I can give that out to anyone, the second file is the key that unlocks the padlock and that's never shown to anyone. Nad installed my public key (padlock) on my server, so now I can login to it since I'm the only one who has the private key to match that public key.
I need to be in root when making edits to my server I can do this by typing
sudo bashI can now access my server using the following command from the shell on my computer that has the private key on it:
ssh SERVER@IP
I then used apt-get (which is program behind the desktop's Software Manager application) and installed the necessary packages for the LAMP stack on my server (this is a very simplified version of the Install a new server procedure):
apt-get update
apt-get upgrade
apt-get install sudo host screen ntp p7zip-full bzip2 unzip git curl librsvg2-bin imagemagick
apt-get install mariadb-server nginx php5-fpm
apt-get install php5-cli php5-mysqlnd php5-gd php5-mcrypt php5-xsl php5-intl php5-xmlrpc php5-curl php-apc
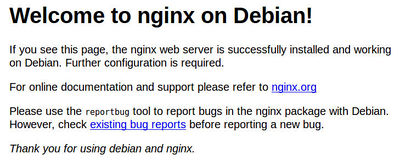
I was then able to see that Nginx (the web-server) was running and successfully installed by going to cy.rusty.space in a browser which looked like this:
The PURPOSE of Nginx is to map requested domains to directories.
I could make edits to this test page by looking in the /var/www directory which is where Nginx puts all the web pages, and finding that the test page was in the file /var/www/html/index.nginx-debian.html. So I used the nano shell text editor to edit the file and then refreshed the browser page to see that my edits had changed the message.
nano /var/www/html/index.nginx-debian.htmlNote: Use CTRL+X and then type Y, Enter to save changes and exit (here's a quick reference for the keys).
I also needed to remove some packages that I accidentally added from the big Install a new server procedure that weren't needed on my server and would slow it down too much. I didn't realise my server couldn't handle email so I removed these packages with the apt-get remove command.
apt-get remove exim4-daemon-heavy dovecot-common dovecot-imapd spamassassin spamc maildirsync
Quick note is if im making edits to the Nginx config file I need to restart Nginx by typing in the following command in shell
service nginx restartLinode Server set up
On Dec 22nd 2016 I came back to setting up a new server by myself. I first started by going to www.linode.com (They specialize in Linux only) they call their servers "Linodes". I logged in using Arans account (username: aranad) and selected the cheapest linode which is $.015 / hr ($10 / mo) and chose a location, mine was based in Frankfurt in ze Fatherland. I then clicked add a linode then the next step was running an OS on the server so I clicked on Dashboard and selected Deploy an Image, I just used default on all the settings, Which the OS it would use was Debian 8 then set a password and clicked Deploy then clicked Boot on the next screen.
I could then see my Server status as running and could ssh into the Server by going sshroot@(server IP goes here) I installed the necessary packages for the LAMP Stack on my server(above) and cloned my git repo into root@debian:/var/www by doing git clone https://github.com/Cyrusty/cy.rusty.space.git


