Editing PDF files in Linux
We need to deal with filling out forms a lot here at Organic Design, so we've put together this documentation for how we do this.
Contents
Prerequisites
First install the following two applications with your package manager:
- Xournal - this allows adding text, images, highlighting and drawing over PDF pages
- PDF arranger - use this to combine pages from various PDFs together
Step 1: Create a working directory
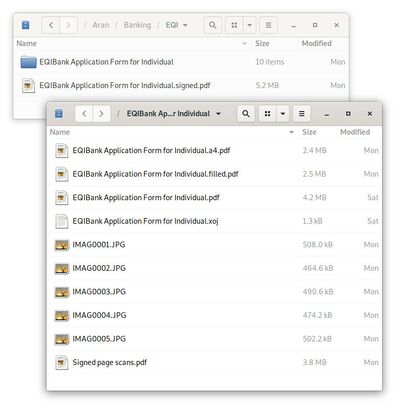
Normally quite a lot of working files will be created throughout this process, and it's best to keep all of these in case you need to make modifications later. The image to the right shows an example of our usual workflow, the first window shows the parent directory that contains the final filled in and signed form that will be sent back to the issuer, in this case a bank.
Along side this final result is the working directory, the contents of which is shown in the second window below the parent. This working directory contains the original form from the bank, various stages of editing as well as scans of signed pages and a PDF of the scans collected together.
Step 2: Fill out the form using Xournal
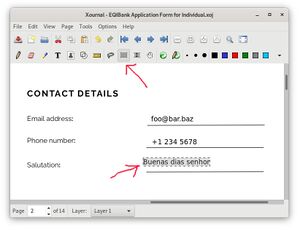
Open the PDF in Xournal and then use the font tool to fill in all the parts of the form that don't need to be done by hand using an appropriate sized font. The font tool doesn't allow for accurate positioning of the text, but just place it in approximately the right place, and then use the rectangular selection tool to move things more precisely afterwards. You can click on a single text item or drag a rectangle over a number of items, and then drag them into position as shown in the image to the right.
Save the final filled in form into the working directory in Xournal's native xoj format, and also export it to a new PDF, our convention is to use the extension .filled.pdf for this PDF file name. You can see we have a filled file in our working directory to the right.
Step 3: Printing and scanning
Print out the pages of the form that need to have manual additions such as initials, hand-written names or signatures. And then scan the signed pages back in. The scanned results need to be in PDF form so that they can all be combined into a single resulting PDF file at the end. You can either use your scanners PDF setting for this, or you might prefer to use an application like Libre Office to assemble a collection of scanned images together in a single document that you can export to a PDF.
Step 4: Assemble the final PDF
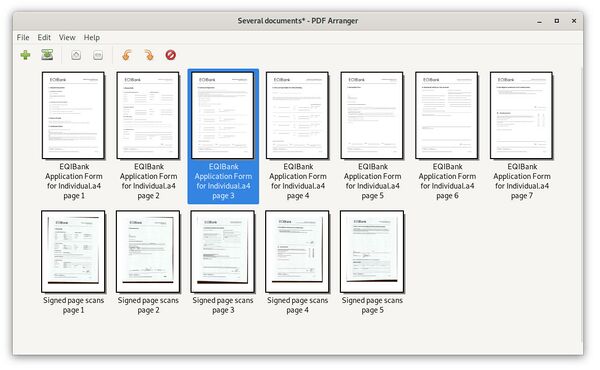
Finally we open the filled PDF with PDF arranger, and then add the single or multiple PDFs of your scanned signed pages. You can then delete each of the pages from the filled PDF and drag the scanned version of that same page into the correct position in the document (i.e. the position that the page you just deleted was in).
Below is an example showing PDF arranger with the EQI bank filled form's 7 pages and 5 scanned pages below those ready to be dragged into position. You can see one of the filled pages is selected, hitting the delete key will remove this page and the scanned version of the same page can then be dragged into position.
Once all the scanned pages are in position, then this file can be saved in the parent directory. Our convention is to use the .signed.pdf extension for this final file.


