Difference between revisions of "A feng shui emergency!"
m |
m (mobile friendly image tables) |
||
| Line 4: | Line 4: | ||
The immediate plan which has already been completed over the last couple of days, was to remove the "BB" (Beth-Box) containing the solar components and put the battery and inverter into a new outside box. The charge-controller is now on the wall so we can still see the battery and panel status easily. | The immediate plan which has already been completed over the last couple of days, was to remove the "BB" (Beth-Box) containing the solar components and put the battery and inverter into a new outside box. The charge-controller is now on the wall so we can still see the battery and panel status easily. | ||
| − | + | {{table | |
| − | + | |[[File:New box for battery and inverter.jpg|300px]] | |
| − | + | |[[File:Charge controller new location.jpg|169px]] | |
| − | + | }} | |
This was also a good opportunity to tidy up some messy wire joins and put some of my new heat-shrink to good use :-) I also moved the network hum from its unsightly location on the bottom of the loft floor to a hidden location behind the wall panel, and I cut that panel and made it into a little door so it's easier to work on in future as that panel is the main location where all the power and network connections join up. | This was also a good opportunity to tidy up some messy wire joins and put some of my new heat-shrink to good use :-) I also moved the network hum from its unsightly location on the bottom of the loft floor to a hidden location behind the wall panel, and I cut that panel and made it into a little door so it's easier to work on in future as that panel is the main location where all the power and network connections join up. | ||
| − | + | {{table | |
| − | + | |[[File:New hub location.jpg|254px]] | |
| − | + | |[[File:House wire joins with heatshrink.jpg|452px]] | |
| − | + | }} | |
And so back to the original point: the space saved by moving these things outside has meant we now have a very spacious and organised bathroom! | And so back to the original point: the space saved by moving these things outside has meant we now have a very spacious and organised bathroom! | ||
[[File:New "bathroom".jpg|452px]]|2=}}<noinclude>[[Category:Blog items]][[Category:Posts by Nad]][[Category:Our third year on the land]]</noinclude> | [[File:New "bathroom".jpg|452px]]|2=}}<noinclude>[[Category:Blog items]][[Category:Posts by Nad]][[Category:Our third year on the land]]</noinclude> | ||
Latest revision as of 15:40, 20 May 2015
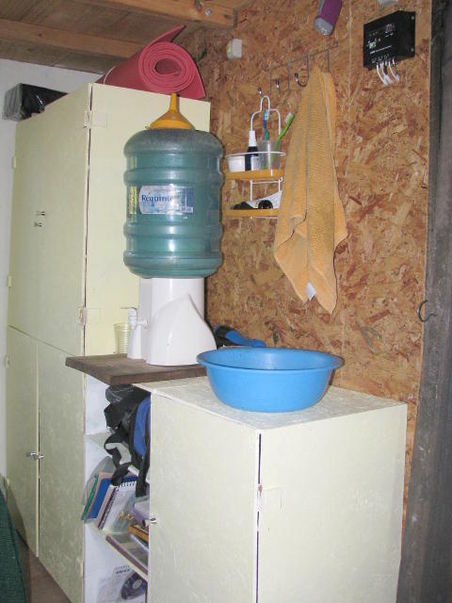
Living in a tiny house makes you think carefully about what things you really need, and helps you to lead a much more minimalist and organised lifestyle. In a tiny house it's much more apparent when things aren't organised well, and this gives you a strong incentive to fix problems and get things into an orderly state quickly. For example, a few days ago when Beth had just woken up and was coming down the loft ladder still half asleep, her foot accidentally violated procedure and moved from the lounge area into the bathroom area! The "bathroom" is a shower-shelf in the middle of the South wall and bowl of water on Beth's computer desk! Her foot knocked over the bowl and poured the water all over the desk and floor! Luckily none of it went onto her computer, but it was still a very clear wake-up call - literally!
So I did some thinking about how to optimise the space a little better, and came up with a long-term plan and an immediate plan. The long term idea is to extend the toilet room southward by about 30cm and then put another north wall in there 30cm more to the south - effectively moving the whole toilet room 30cm southward. Then within this extra 30cm of space between the house and the toilet I can put all the tool shelves - basically pushing them back 30cm into the wall. That can then become a closable cupboard which will save some space along that wall and also look a lot more open and tidy.
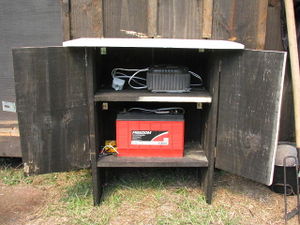
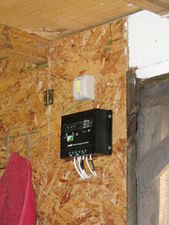
The immediate plan which has already been completed over the last couple of days, was to remove the "BB" (Beth-Box) containing the solar components and put the battery and inverter into a new outside box. The charge-controller is now on the wall so we can still see the battery and panel status easily.
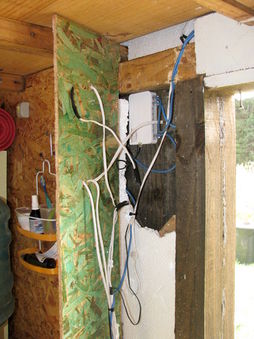
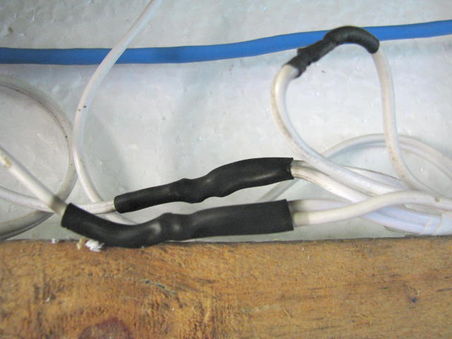
This was also a good opportunity to tidy up some messy wire joins and put some of my new heat-shrink to good use :-) I also moved the network hum from its unsightly location on the bottom of the loft floor to a hidden location behind the wall panel, and I cut that panel and made it into a little door so it's easier to work on in future as that panel is the main location where all the power and network connections join up.
And so back to the original point: the space saved by moving these things outside has meant we now have a very spacious and organised bathroom!
