Our third year on the land (blog)
Antenna 2.0[edit] |
| Posted by Nad on 10 June 2015 at 12:12 |
|---|
This post has the following tags: Our third year on the land
|
| Well here it is, the long-awaited Antenna 2.0 blog post!
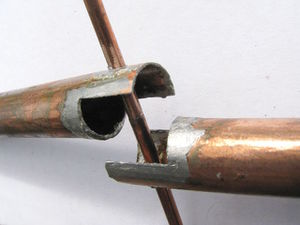
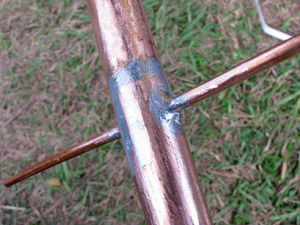
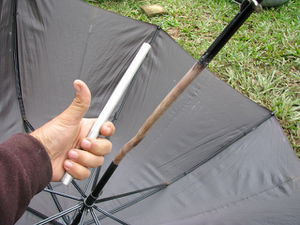
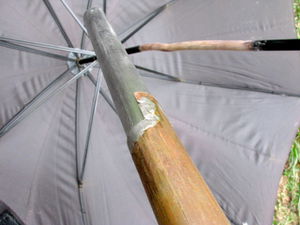
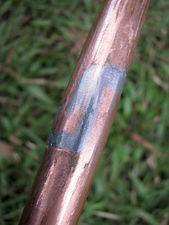
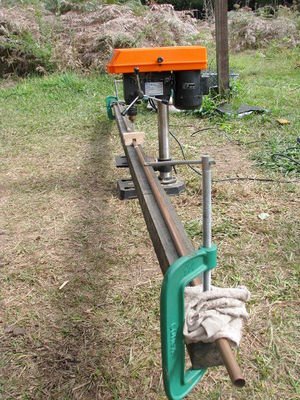
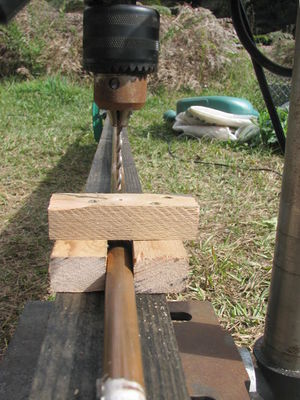
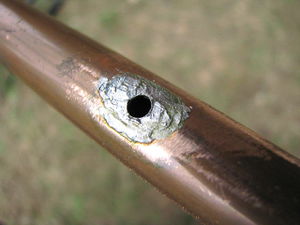
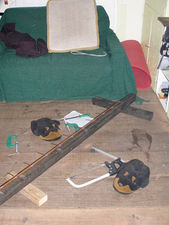
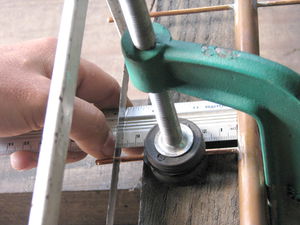
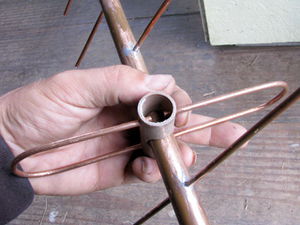
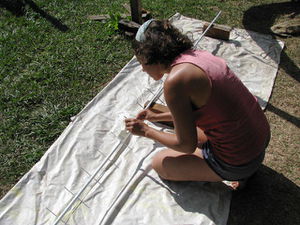
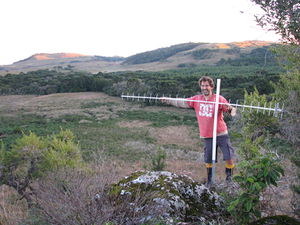
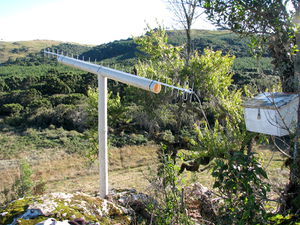
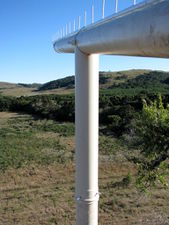
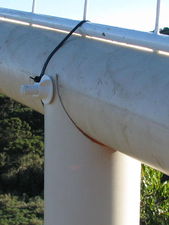
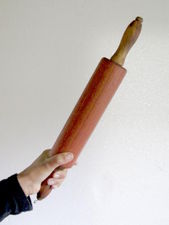
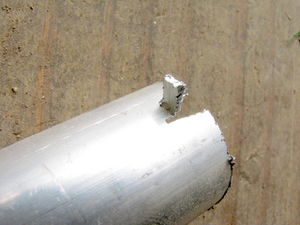
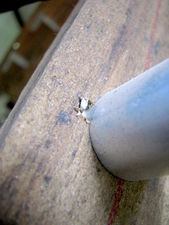
Our net's been getting worse and worse over the last year, not only slower, but also we have a long delay before connecting - sometimes more than an hour! And so I thought that a bigger antenna may help by enabling us to use 3G instead of 2G. Even though the problem is mainly with our provider, Vivo, because we often a perfect 5-bar 2G signal, but still have a very slow connection, we figure that a bad 3G connection will be a lot better than a bad 2G connection! So the first step was to get the metal, thick copper tubing for the boom and thin copper for the wave-guides. Our friend Eduardo happened to have a load of six metre copper tubes - he builds apartments and has a huge "hardware store" below one of them where he keeps all the left overs and spare parts, there's rows of shelves full of pipes and cables and even areas with dozens of porcelain sinks and toilets! The new antenna is three meters, but unfortunately we needed to get it in two pieces to fit on the bus and in our little hire car. He didn't quite have thick enough single-core copper cable for the wave guides, so we went to a metal scrap yard for that and picked up ten metres of uninsulated 3mm diameter copper wire. The first part of the construction job was to join the pipe back into a single three meter length. Unfortunately I still haven't bought an acetylene tank for my gas welding kit, so I had to make do with soldering instead of brazing. I cut the ends as shown below to increase the join length and filed the ends at an angle (not shown in the photo) so the solder would still be strong after filing the pipe smooth, and I also positioned the join exactly where a wave-guide would sit to further increase strength... ...but all to no avail, the solder was just too weak to support the weight of such a long length. So I figured that the best way would be to have a section of slightly smaller diameter pipe that fitted inside the main pipe that would support the join from the inside and stop it from bending. But there's no way we'd be making a dedicated trip to the city and searching round for days for a piece of tube just the right size in the near future, so I figured that the project would have to be put on the back burner for a while. But then a stroke of luck hit, one morning I opened the door, and there was the umbrella which had fallen on the ground and broken into three parts somehow - and you'd never believe it, but the tube that had somehow broken was exactly the right size to use for the antenna join! I quickly fixed the umbrella with a piece of wood as I sensed some rolling pin activity on the brew :-/ So the next step was to drill the holes for all the wave guides. I needed to ensure that they were all on exactly the same plane without twisting so I clamped the pipe firmly onto a straight piece of wood and made a guide that would ensure that all the holes were in exactly the same position on the pipe. Then next I filed and tinned the holes and soldered the wave guides in. I actually found that soldering them by holding the joins over the gas oven element was easier than the soldering iron because the pipe sucks all the heat away - again brazing them would be by far the easiest and strongest solution. I made sure the metal I soldered in for the wave guides was a few millimetres too long so that I could cut and file them perfectly to length afterwards. The most difficult part to get exactly the right size and shape is the folded dipole, the bit that the cable joins to. But after a couple of attempts I made one that was accurate to about half a millimetre. I attached it to the boom in a piece of PVC pipe as shown below. And then the final steps, painting it and putting it up on the hill! Beth's much better at painting than me so she took care of this part :-) And so what was the final result?! Well.... kind of mixed results really... it can only get a two bar 2G signal whereas the small one gets a full five bar signal. It picks up a zero or one bar 3G signal which is about the same as the small one, but the 3G connection seems to consistently work, whereas the small antenna's 3G connection is very intermittent. More testing is needed, and there's a few tweaks that can be made to improve performance, but overall the results are rather disappointing :-( Update: Well I've spent a few days reading, talking to radio engineer friends and doing some adjustments and the result, while not awesome, looks like it has at least achieved the goal of getting us into consistent 3G. First I replaced the metal bolt that was used to mount the folded dipole with plastic, then I mounted the whole thing onto a large PVC pipe so that the antenna can be held very straight since it was bending under it's own weight when not supported. We've had some very rainy days and misty mornings and our 3G connection has continued to function throughout it all which the small antenna could never have done, so although it's unable to get a decent 2G signal, it's definitely performing more consistently on 3G, and that's the most important thing. We seem to be getting between 500 kilobits and one megabit most of the time, which means we should be able to do voice and maybe even video now :-) |
Kitchen gets real[edit] |
| Posted by Nad on 22 May 2015 at 21:20 |
|---|
This post has the following tags: Our third year on the land
|
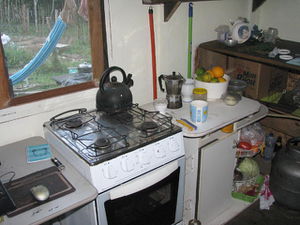
| On out last visit to Caxias and Canela, Beth decided it was finally time to bite the bullet and get a proper oven! our little blue camping over has been with us right from the start and done a really good job, but Beth felt it was time to move on. We arrived back at the land about a week ago, but just got round to installing the new oven today, and now our place looks like a real kitchen! This is our third kitchen renovation since we started living here on the land :-) |
Giant kumara![edit] |
| Posted by Nad on 20 May 2015 at 15:57 |
|---|
This post has the following tags: Our third year on the land
|
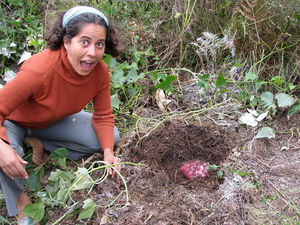
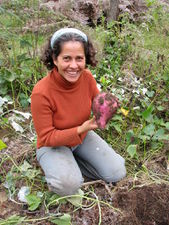
| We thought the Kumara looked pretty big and healthy as you can see from the photos of the leaves a few posts back, but we couldn't see any actual kumaras. Our neighbour Ziza told us that after the leaves turn black when it starts getting cold that's the time to harvest the kumaras, and we should see their tops poking out of the ground. But when the leaves turned black we couldn't see any! We dug around a little, but to no avail.
Then later Beth was clearing up one of the garden beds ready to plant some more things, when she suddenly came across a giant kumara! We searched around for more but could only find a few tiny ones. It looks like all the healthy leaves and vines spread everywhere were all supporting this one giant vegetable! Even though there was only one, the fact that it's so big and healthy is another really good indication that the soil's getting much better. Beth dug it up and I grated it and then we fried it with an onion and ate it. It was really nice and was more than enough for two - in fact we didn't need anything else for dinner that night :-) |
New loft ladder[edit] | |||||
| Posted by Nad on 10 May 2015 at 21:44 | |||||
|---|---|---|---|---|---|
This post has the following tags: Our third year on the land
| |||||
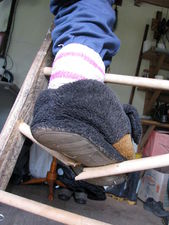
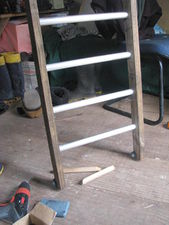
Yep that's right, our nice looking loft ladder wasn't all it was cracked up to be, and a step broke on it almost leading to an accident :-( Beth's been really scared going up and down it, especially when tired in the middle of the night and the mornings, and after a few weeks of procrastinating, the rolling pin finally came out! So I quickly got some aluminium tube (thanks Eduardo!), adjusted the size of the holes in the wood to fit it and replaced all the dowel. Another problem that had begun and could have lead to trouble was that some of the screws holding the steps tight were getting loose and allowing them to spin when stepping on them. So I've accounted for that problem with the new aluminium steps as well: To hold the hole thing together, there's a long threaded-rod through every third tube bolted on each side. |
Exploring the red-light district[edit] |
| Posted by Nad on 22 April 2015 at 16:34 |
|---|
This post has the following tags: Our third year on the land
|
| At first our only red-light experiences would occur accidentally when we'd suddenly realise after some time that were were in the red light zone, upon noticing this we'd quickly make our way directly back to safe territory! But after this happened a few times we noticed a slight curiosity setting in and found ourselves spedning a little more time on the edge before leaving. Then today we took the plunge! We decided it was time to let go of fear and explore the red light district fully! And you know what? there's nothing to be scared of in there at all! In fact it turns out that's where all the potential is, and I'm even going to be working there a lot of the time!
Wait! come back! I can explain... I'm not talking about that red light! I mean this one, the red light on our charge-controller of course! The photo is a messed up one that I took when the flash was really needed, but it suits the post quite well :-) The red light means that the battery is very low and that the power will be cut off soon. In the last few months we've noticed that the performance of the battery has decreased a lot, and we're getting into red-light territory more and more often. Then a few days ago, we had a full charge at the end of the day (flashing green light), and then after only an hour or so on the net in the evening, we were right back in the red light zone! So we thought we really needed to explore this red light territory thoroughly! And that's when we discovered what I was trying to say above - that all the potential is there! It took an hour to go from fully charged (about 13.9 volts) to the red light at 12.1 volts, but over an hour to go from there down to 11.95! And we still don't know how far the red-light zone goes - we went all the way to 11.75 volts today, but we still haven't been cut off! So we're going to be spending a lot more time in red-light territory from now on, and I'll even be doing a lot of my work down there, because we really need to know once and for all how far down it goes :-) |
A feng shui emergency![edit] |
| Posted by Nad on 14 April 2015 at 00:01 |
|---|
This post has the following tags: Our third year on the land
|
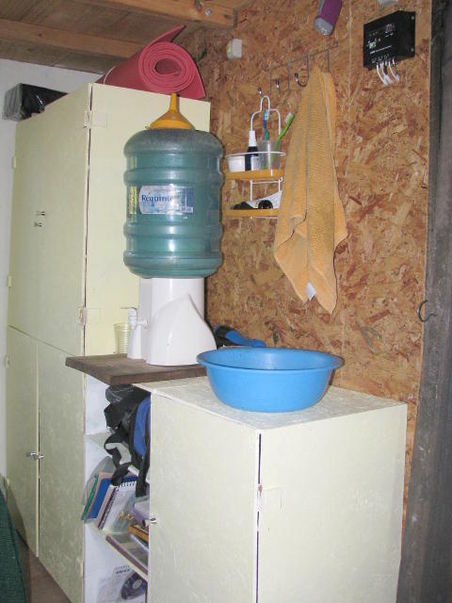
| Living in a tiny house makes you think carefully about what things you really need, and helps you to lead a much more minimalist and organised lifestyle. In a tiny house it's much more apparent when things aren't organised well, and this gives you a strong incentive to fix problems and get things into an orderly state quickly. For example, a few days ago when Beth had just woken up and was coming down the loft ladder still half asleep, her foot accidentally violated procedure and moved from the lounge area into the bathroom area! The "bathroom" is a shower-shelf in the middle of the South wall and bowl of water on Beth's computer desk! Her foot knocked over the bowl and poured the water all over the desk and floor! Luckily none of it went onto her computer, but it was still a very clear wake-up call - literally!
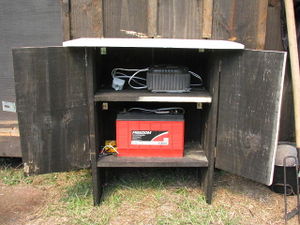
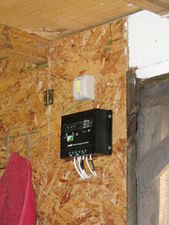
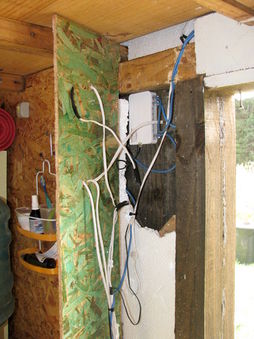
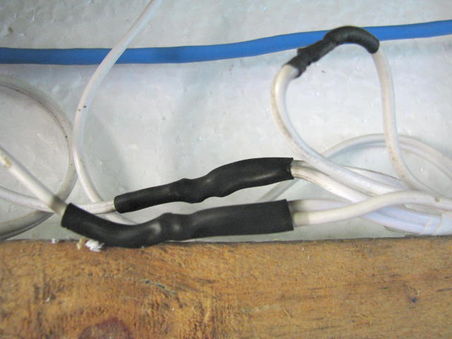
So I did some thinking about how to optimise the space a little better, and came up with a long-term plan and an immediate plan. The long term idea is to extend the toilet room southward by about 30cm and then put another north wall in there 30cm more to the south - effectively moving the whole toilet room 30cm southward. Then within this extra 30cm of space between the house and the toilet I can put all the tool shelves - basically pushing them back 30cm into the wall. That can then become a closable cupboard which will save some space along that wall and also look a lot more open and tidy. The immediate plan which has already been completed over the last couple of days, was to remove the "BB" (Beth-Box) containing the solar components and put the battery and inverter into a new outside box. The charge-controller is now on the wall so we can still see the battery and panel status easily. This was also a good opportunity to tidy up some messy wire joins and put some of my new heat-shrink to good use :-) I also moved the network hum from its unsightly location on the bottom of the loft floor to a hidden location behind the wall panel, and I cut that panel and made it into a little door so it's easier to work on in future as that panel is the main location where all the power and network connections join up. And so back to the original point: the space saved by moving these things outside has meant we now have a very spacious and organised bathroom! |
A little can go a long way[edit] |
| Posted by Nad on 5 April 2015 at 13:22 |
|---|
This post has the following tags: Our third year on the land
|
| After we arrived at the land this time, we didn't bring much food, we planned to go shopping after a couple of weeks. But after two weeks we didn't want to interrupt our meditation practice by going for a complicated busy trip to Canela so we decided to put it off for another week even though it would mean we'd have to put up with a pretty bland diet.
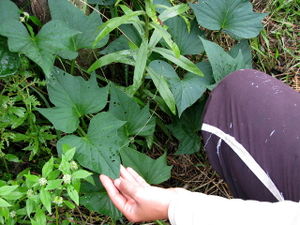
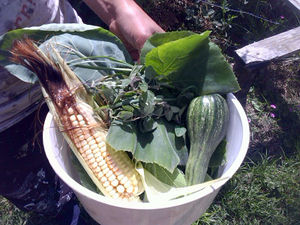
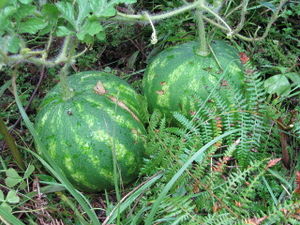
But after another week we'd found that it wasn't so bad - there were always various little things available in the vege patch that made the food a little less boring. Now we've been here five weeks and we're still doing fine! We've found that the vege patch works both ways - not only does it have to slowly improve so that it can produce more, we have to learn more about what it has to offer! For example, Beth discovered that Kumara and pumpkin leaves are edible and high in vitamins and minerals. The pumpkin leaves are a bit too rough to eat raw, but are good when cooked and added to soup or stir fry. The Kumara leaves have a really nice flavour and can even be added raw to salads. The vege patch is producing a lot of other things in very small quantities too such as courgettes, sweetcorn, capsicums, onions and garlic. Even though it's a very small amount, it goes a long way when you don't have a lot of variety, but you can add a small but of capsicum or a few cherry tomatoes to a meal - and although the quantity is small, there's always something there :-) There are always many herbs in the garden for adding to meals or having in tea, and the lime tree leaves make a good tea even though it's not bearing any fruit yet. We even had watermelon last week and yesterday, and the forest has been providing some blackberries :-) It looks like in a couple of years we'll have the opposite problem - we'll always have an overload of fresh fruit and vegetables, but will have to ration our rice and other dry goods since we'll probably only be going shopping two or three times per year! |
Xispita[edit] |
| Posted by Nad on 31 March 2015 at 20:00 |
|---|
This post has the following tags: Our third year on the land
|
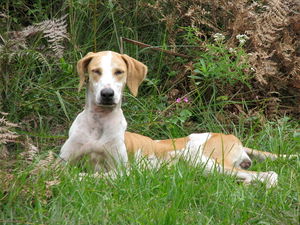
| About a week ago when I was working on the east extension a guy suddenly stumbled out of a thick part of the bushes. He was looking for his dog Xispita who'd gone missing a couple of days earlier, he carried on into the forest and we heard him calling her name for a while. The next evening we heard a dig crying in the forest somewhere and went for a walk calling out to her, but she didn't answer. Then about a week later when we were having breakfast a dog suddenly appeared out of the bushes at about the same place the guy had appeared before! We're not sure if it's his dog though because he said she was white, whereas this one has more brown on her than white, but we started calling her Xispita anyway :-)
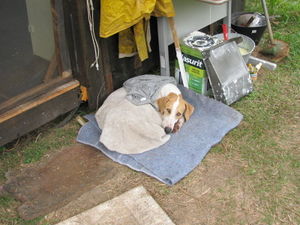
She wasn't very well and seemed to have a bit of a fever, she ate a bit the first day, but then wouldn't eat at all the next day (although maybe its just that she didn't like polenta, lentils, beans or porridge!). She was very cold in the night and we had to put a towel on her so she'd stop shivering. The next day after an hour or two in the sun she started looking a lot better, and then ate a bit of polenta. She started seeming like she was at home, exploring the garden and following us whenever we went of to do work at remote areas of the land :-) But then later in the evening she left and hasn't been back for a couple of days now... perhaps she just needed somewhere to stay and recuperate for a couple of days on her travels.
|
The awesome power of gambiarra[edit] |
| Posted by Nad on 25 March 2015 at 21:28 |
|---|
This post has the following tags: Our third year on the land
|
| Now that we're on a daily schedule we seem to getting a lot more done on the land even though we have so much meditation to do each day! Beth's been making excellent progress painting the inside of the house and cutting the grass and weeds around the vege patch and other areas on the land. And I finally completed the east extension which has been an outstanding job for at least a year!
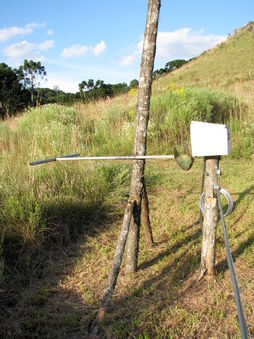
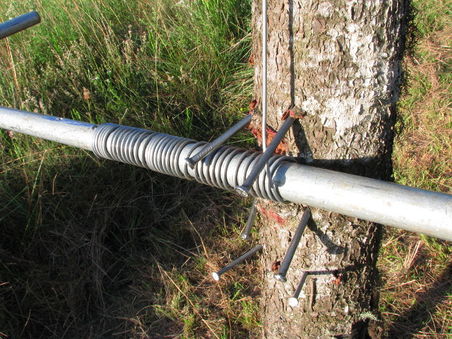
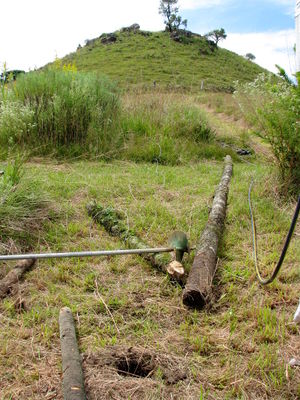
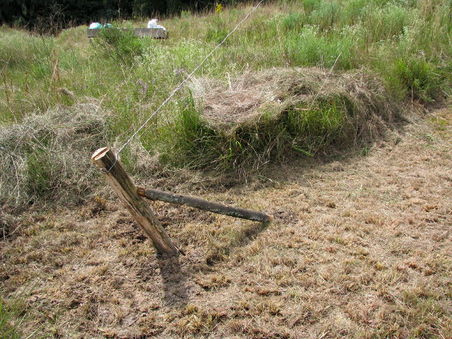
Over the last few days I've been working on getting the upper segment of the PVC pipe containing the net cables raised overhead so we don't end up with the same, or similar, trouble as the lower segment (i.e. having it eaten by giant swamp rats!). This job turned out to be a lot more difficult than expected, because the weight of the hundred or so metres of PVC pipe made the force required to pull the wire straight into the equivalent of hundreds of kilograms! The standard fence wire-tightener was useless in this scenario because it's made of too thin a metal and also the force required to turn the bolt soon becomes too much. So I had to let the cable back down and figure out a different approach. The next day when making a hole for Beth I suddenly realised that the hole-making tool I was using could work as an excellent high-force wire-tightener if it had a hole drilled in the middle! This new Gambiarra tool worked very well, and before long I was able to pull the wire tight with hundreds of kilograms of force no problem :-)
Nek minute....
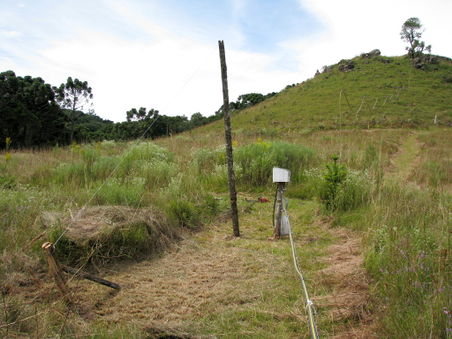
The force was so much that the whole pole was ripped right out of the ground!!! Actually it was a bit of a design failure because since the force is pulling from above the pole, the forty-five brace was of little use in strengthening it, so yet again I had to go back to the drawing board :-( The next day I added a new shorter pole about four metres behind the tall one and put it deeper in the ground and put it at an angle roughly perpendicular to the direction of the force. The original pole is now just lifting the cable so it only experiences a downward force and needs no braces, it's settled to an angle halfway between the directions of the short pole and the top of the hill. So far this solution seems to be holding up! |
Sleeping in the loft again[edit] |
| Posted by Nad on 15 March 2015 at 13:35 |
|---|
This post has the following tags: Our third year on the land
|
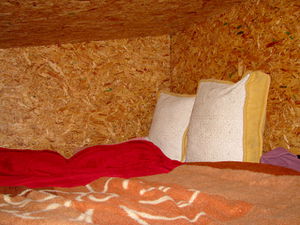
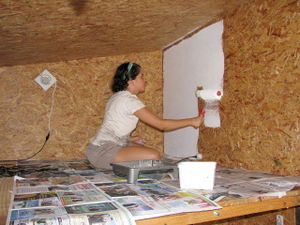
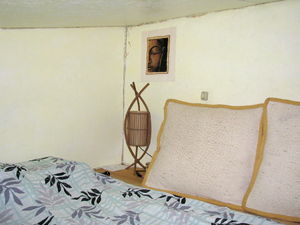
| We've been sleeping on the fold-out couch for the last week while Beth put a few coats of paint in the loft to try and resolve the toxic off-gassing problems with the OSB (oriented strand board). The paint's been dry for a couple of days now, so last night we decided to try out sleeping back up there again. It's actually more of a pleasant atmosphere up there with the lighter colour, and it seems to have worked - we didn't have any asthma!
See Our house#The bedroom for more detail about the loft. |
